So now that I've blown up the motor, we've got to decide whether we want to continue with this boneheaded project.
Luckily, Nathan wants to continue. He can only donate one day a week, but that's fine by me. I'm willing to continue; I've got two and a half years, six thousand dollars, and a lot of ego in this project so far.
Eri's not so sure, and she's got the purse strings. But I'm going to have to replace my Prizm soon, and the monetary cost of fixing the EV is only $1500 or so. That's not going to get me any reliable used car, and it's not enough to fix the Prizm, either. Continuing with Silent E is the most economic option.
Eri insists that we not use a rebuilt or used motor; only a new motor will be satisfactory. That makes some sense, although we come to the understanding that a professionally rebuilt motor could be better than the original, so we can do that as long as it doesn't cost more than a new one.
We were going to rearrange the batteries and cut observation ports today, but we need to get that new motor as soon as possible. And that means we need to find out if this one can be rebuilt, and what caused the problem in the first place (so we don't do it again). And that means pulling them motor.
(bigger)
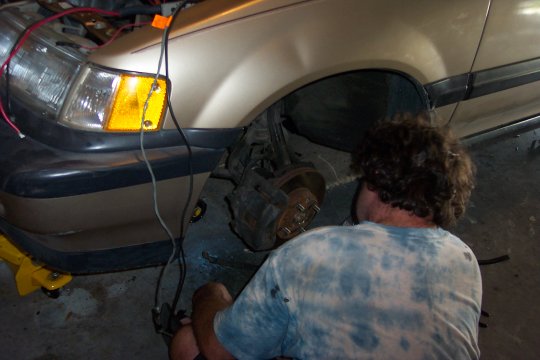
The problem is that Nathan originally installed the motor and the tranny together, from the top with a hoist. We don't have a hoist, so we want to drop it out the bottom.
We break for lunch and try again after half an hour. Stuff keeps getting in our way. First the transfer case is holding the adapter plate, and the motor is attached to it from the inside. Then the body won't let us move it far enough away from the transmission to just drop it. We can't take the cap off, because it has to slide off the shaft; besides, we can't do that in reverse to put the new motor in (the brushes and commutator would be in the way).
Finally, four hours later, as we think we've got it, we don't. The torsion bar is supporting the end of the motor, so we can lever it off the transmission shaft and slide it away.
Break! We've been going eight hours in the Florida garage heat with just a thirty-minute break for lunch. We're wiped out. But we look at the Chilton's manual anyway, and discover that what we thought was a torsion bar is actually a "radius arm". It removes with just a wrench!
(bigger)

(bigger)
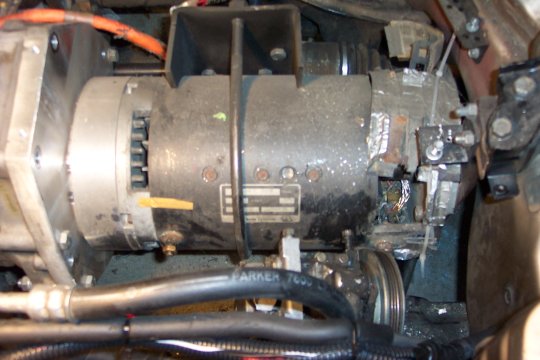
Then we begin the motor disassembly. The clutch, flywheel, and adapter come off while I'm still looking up the directions. Nathan's been working without me! We pull the end cap off the motor and survey the damage. It looks to me like rebuilding is going to be almost the same as starting from scratch.
There's just one piece left: the adaptor hub. That's a two-piece assembly with both a key and a taper-lock fit. We put the motor upright, with the shaft going through the adapter and the removed tire. We try to pry the hub off with our big pry bar, then we hammer the pry bar, then we hammer the hub. Not budging.

So we try some shorter bolts. And some big washers. These look like they might work, until it starts to get tight. Then they start slanting away, too.
What we wind up with is this homemade puller assembly. The final incarnation uses the biggest washers we could find to grip the lower lip as tightly as possible. We used a load of wire ties to hold everything together so the wires couldn't slant away.
I'd like to report that, in Junkyard Wars style, it worked. But in fact we just bent a washer. Luckily, my next-door neighbor is an ex-mechanic, and he's going to lend us a puller after he retrieves it from his shop. I may stop by the Advance Discount Auto Parts and see if they'll lend me one, too.
Finally, it's been nine hours of exhausting work. We clean up the garage, put some penetrating oil on the hub, and start cleaning up. We've scratched some of the adapter surfaces, but nothing major. If any re-machining is needed, I'll do it by hand with polishing compound. We remember what happened last time we tried to work tired, so we're not going to risk injury again.
Anybody got a cheap motor?