Today we worked on getting everything back together. The goal was simply to get everything bolted back in place, not including the batteries, which I've been charging and testing. Will we make it?
Update 2007-05-21: pictures!
The day before, I attempted to install the transfer case. I verified all the bolts were available, did a test fitting, and wiped the oil off of everything. Time for the "Great Stuff".
Messiest. Job. Ever. You get five minutes to put this stuff on the entire surface. Its stickier than (unwholesome comparison deleted). It won't come off your fingers until the skin comes off. I managed to get everything together and bolt it up, but the gasket was starting to feel kinda dry. Unfortunately, my wife returned from a garage sale with a freezer at the same time; I couldn't help because I was under the car.
The next day, when Nathan arrived, we found a weird washer that I had forgotten to put in. Luckily the transfer case will never bear load in this configuration, so the washer will be unnecessary. We hope.
(2160 x 1440)
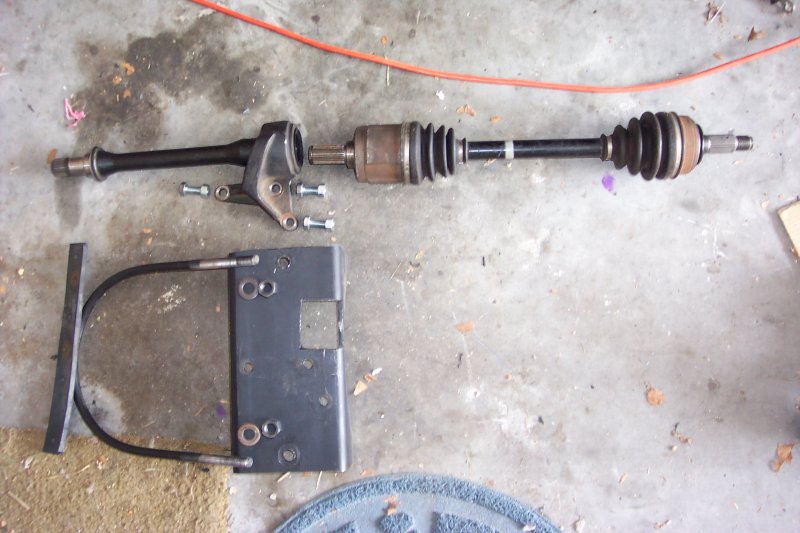
We added the axle bracket to the motor. This is necessary because the half-axle coming out of the transmission was originally mounted to the engine horizontally, before diving at an angle to the wheel hub. Nathan's solution uses giant U-bolts with giant nuts to hold on a 1/4" steel bracket that required a machine shop for the bending. We spent a long time cranking the nuts in different orders to get it level. Then we realized we were actually bending the steel. We're just lucky we didn't break through the motor housing.
Before we put the axle back on, we investigated the rotor. The pads rest lightly on the disc, but it turns quite reluctantly. It makes a scraping sound at the same time. I was hoping for more coasting. I'm afraid it's the bearing; the guys on the Honda Civic Wagon forums tell me I can't replace it, because it's sealed for life. I'm considering swapping a junkyard Integra front end on there; the bigger brakes would be nice, too.
We designed a way to get a spring on the back, so the calipers will retract when the brake is released. The EVDL has warned me in the most strenuous terms not to do this. In particular, it could pull the bearing too far back, spilling brake fluid out of the reservoir and creating a "dead zone" in the pedal travel. I'm still considering it, but in a much more cautious way. One alternative is to find a rotor assembly that will bolt in, but already includes a retracting mechanism. I'm told (the EVDL again) that some Chevys once had this feature.
Otherwise, bolting up the suspension was no big deal. Finding the parts in my messy garage was. For a while we thought we'd have to get a bushing for the torque arm (I think) at a junkyard somewhere. But eventually we located it, underneath the kids' PowerWheels Barbie car. No idea how it rolled there. Nathan reiterated that he hates my work area.

(2160 x 1440)
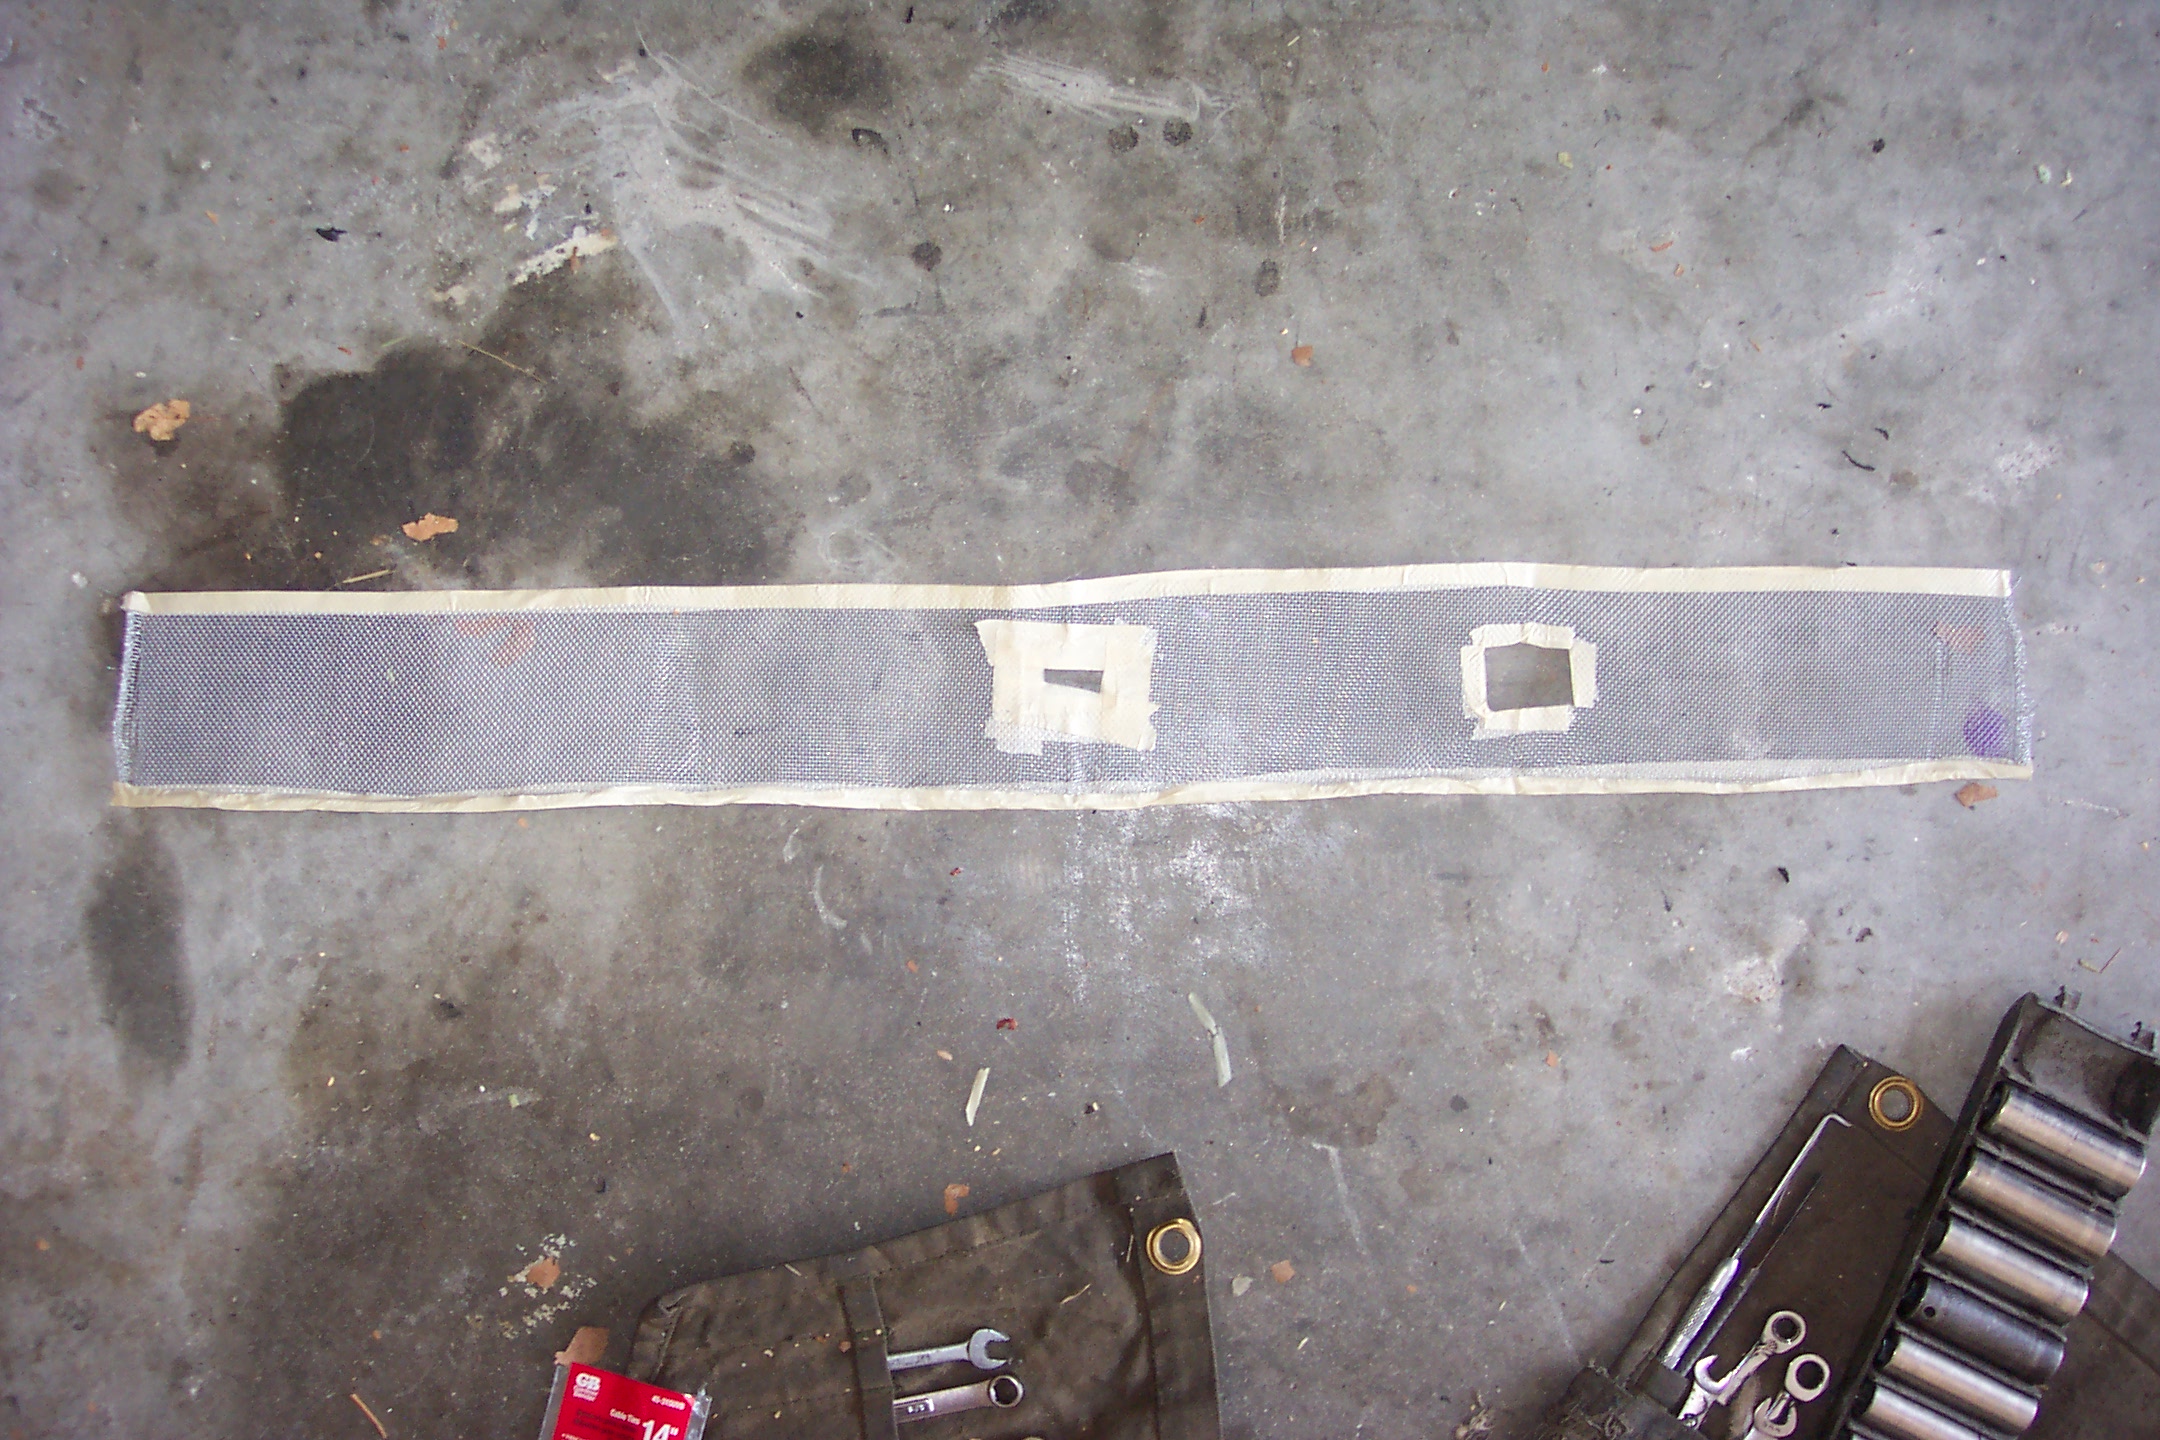
Nathan obtained an old piece of window screening from Lowe's. We cut two 3-inch strips out of it, cut holes for the cable studs, and mask-taped all the edges. Then we used zip ties to tie the strips securely around the motor, just over the air intake and outflow slots. The previous owner had used some heavy-gauge mesh and air filter paper. I think that probably obstructed air flow too much. Our solution will keep out the pebbles and dirt without restricting airflow. It does allow dust in, but that means it also forces brush dust out.

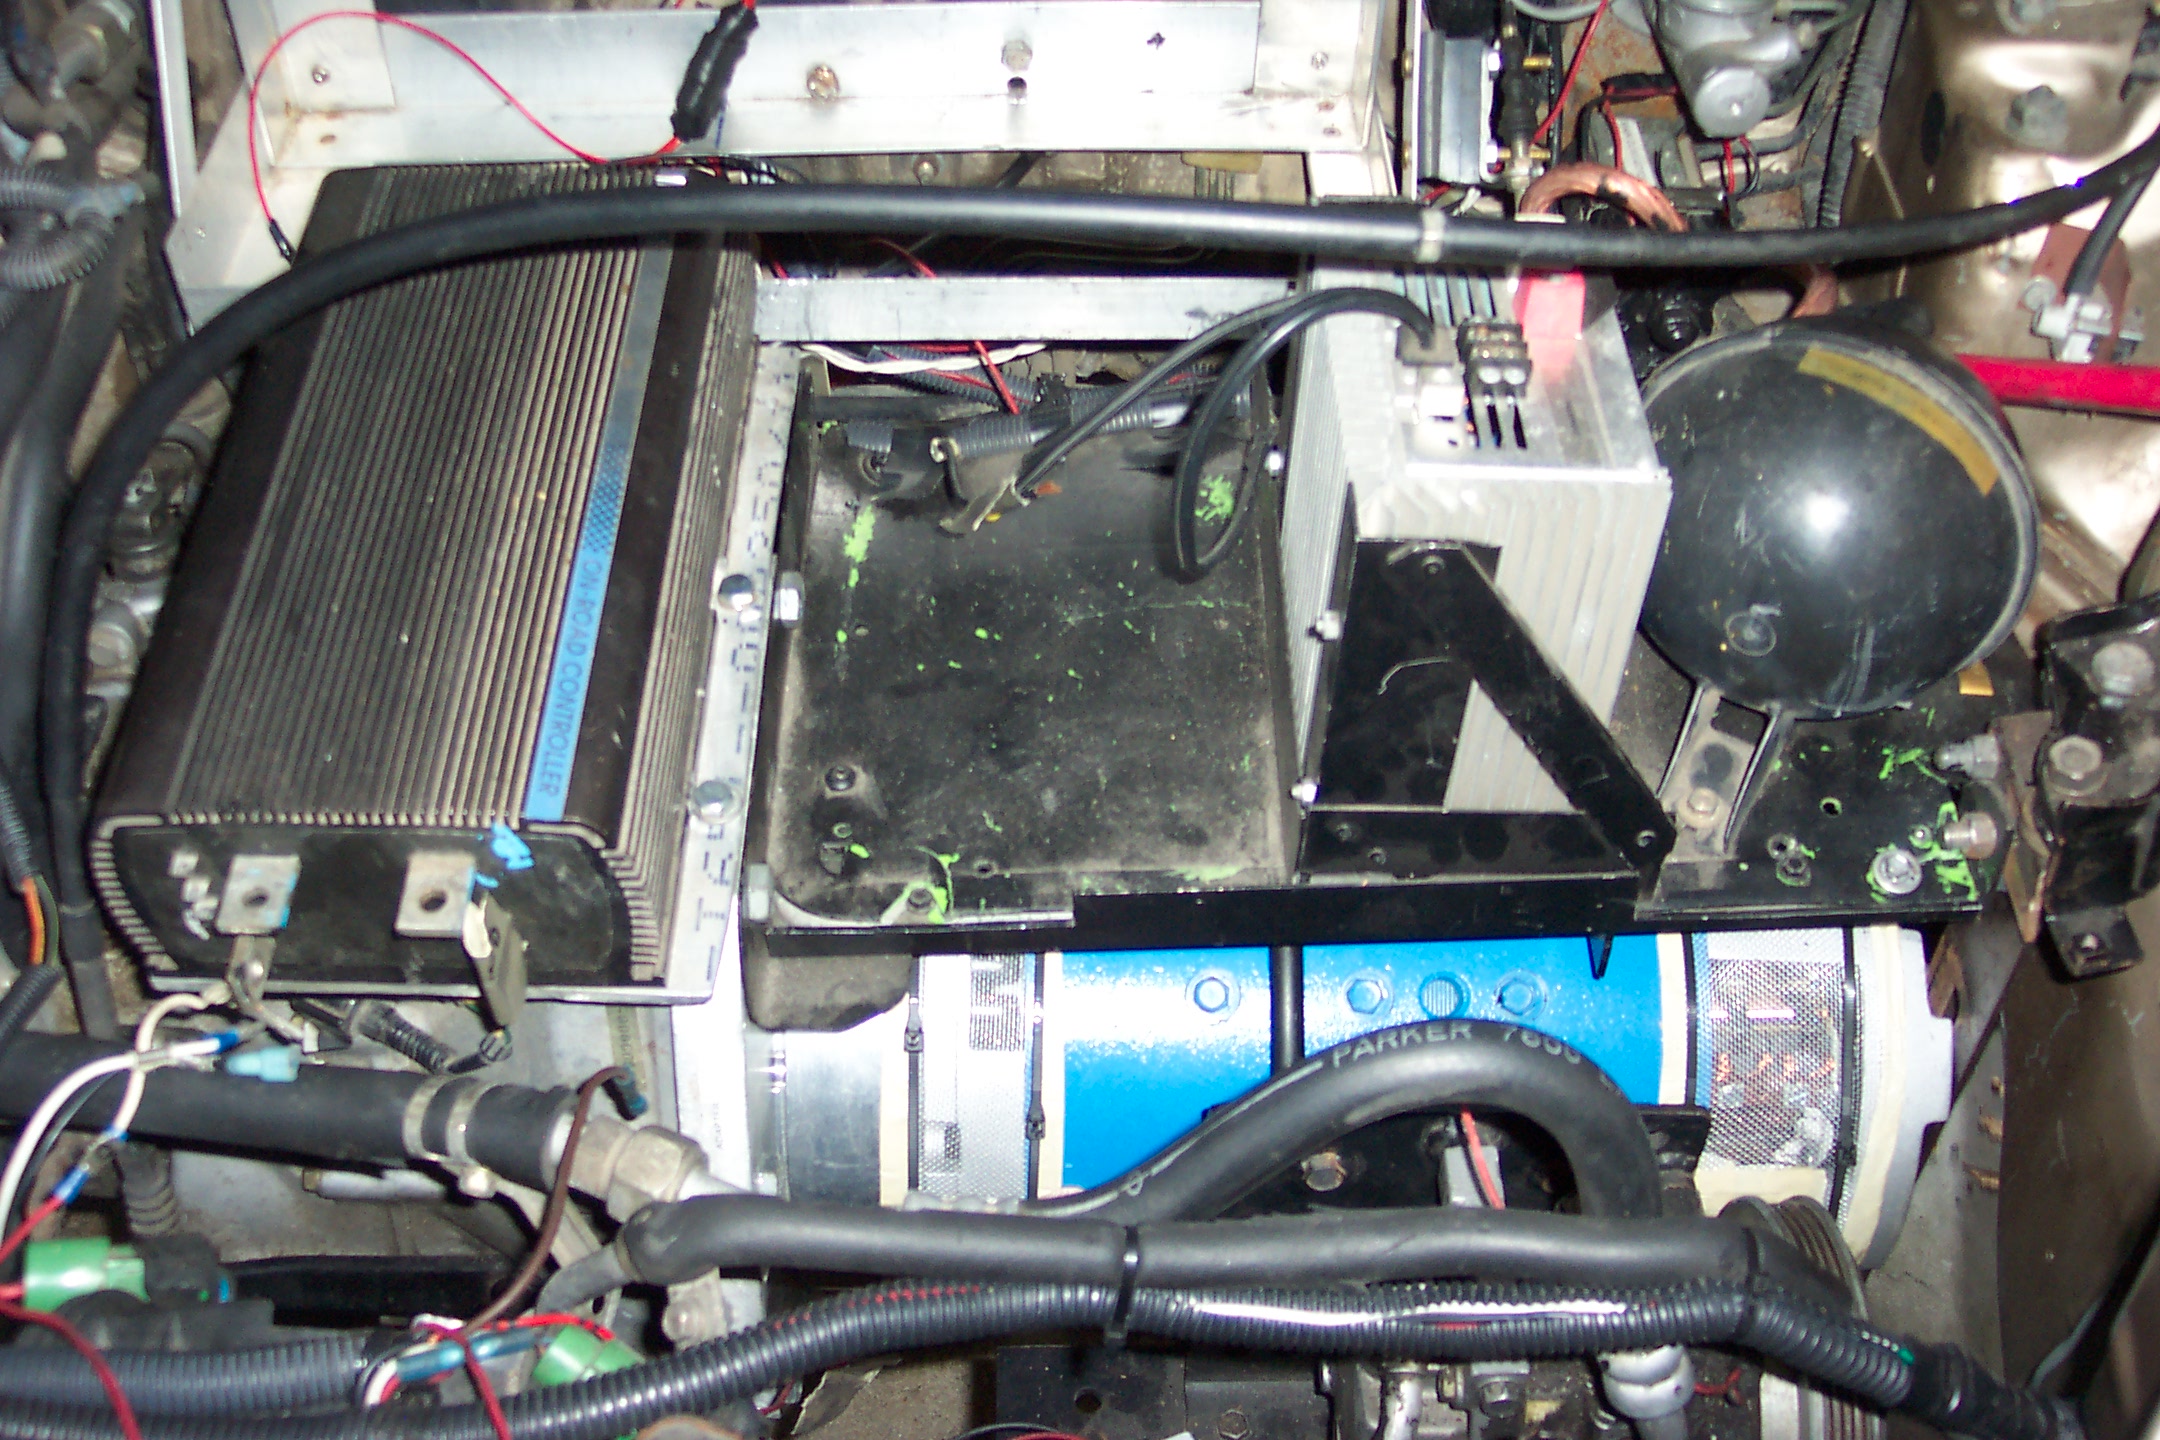
Then began the real nasties. Much ratcheting of wrenches, pulling of prybars, and exercise of previously obscure musculature came into play. (For instance, cranking a socket wrench in 135 degree arcs at a strange angle, while holding the giant extension and bent over a car on jackstands at their highest extension, will strain muscles in your shoulders and back you never knew you even HAD.) We tightened all the mounts, installed the A/C compressor bracket over the front crossmember, installed the A/C compressor onto its bracket, installed the big accessory tray, and installed the controller onto the holes drilled in the adapter.
That took a lot of searching for the appropriate bolts. Nathan again reiterated that he hated my work area. So do I. We eventually found them, and I got my workbench more organized in the process, including finding some other EV-related parts I didn't think I'd ever see again.

(2160 x 1440)
We looked upon our works, and saw that they were good. Time to knock off for the next two weeks, due to ennui and Mother's day. Not much left to do, except charge and reinstall the batteries, put the wheels back on (two of them are on my hatchback right now), and put all the wires back together.
Piece of cake.