Nathan arrived today to help install batteries. First we had to work out a few wiring problems, and then we got busy. We didn't accomplish as much as we'd hoped. But we did get the whole family involved. It was a good day.
We had previously discovered a miscommunication on the subject of the throttle microswitch. This switch provides a signal indicating that the throttle pedal is all the way up. Some controllers use this to initiate electric regeneration, but even controllers without regen should use it to cut off the controller when the pedal is up. Why? Sometimes when this electronic stuff fails, it fails ON. If the throttle potentiometer (which I shall henceforth call a "potbox") fails ON, the switch will at least stop the car from lurching forward all the time.
Besides, coasting is cool.
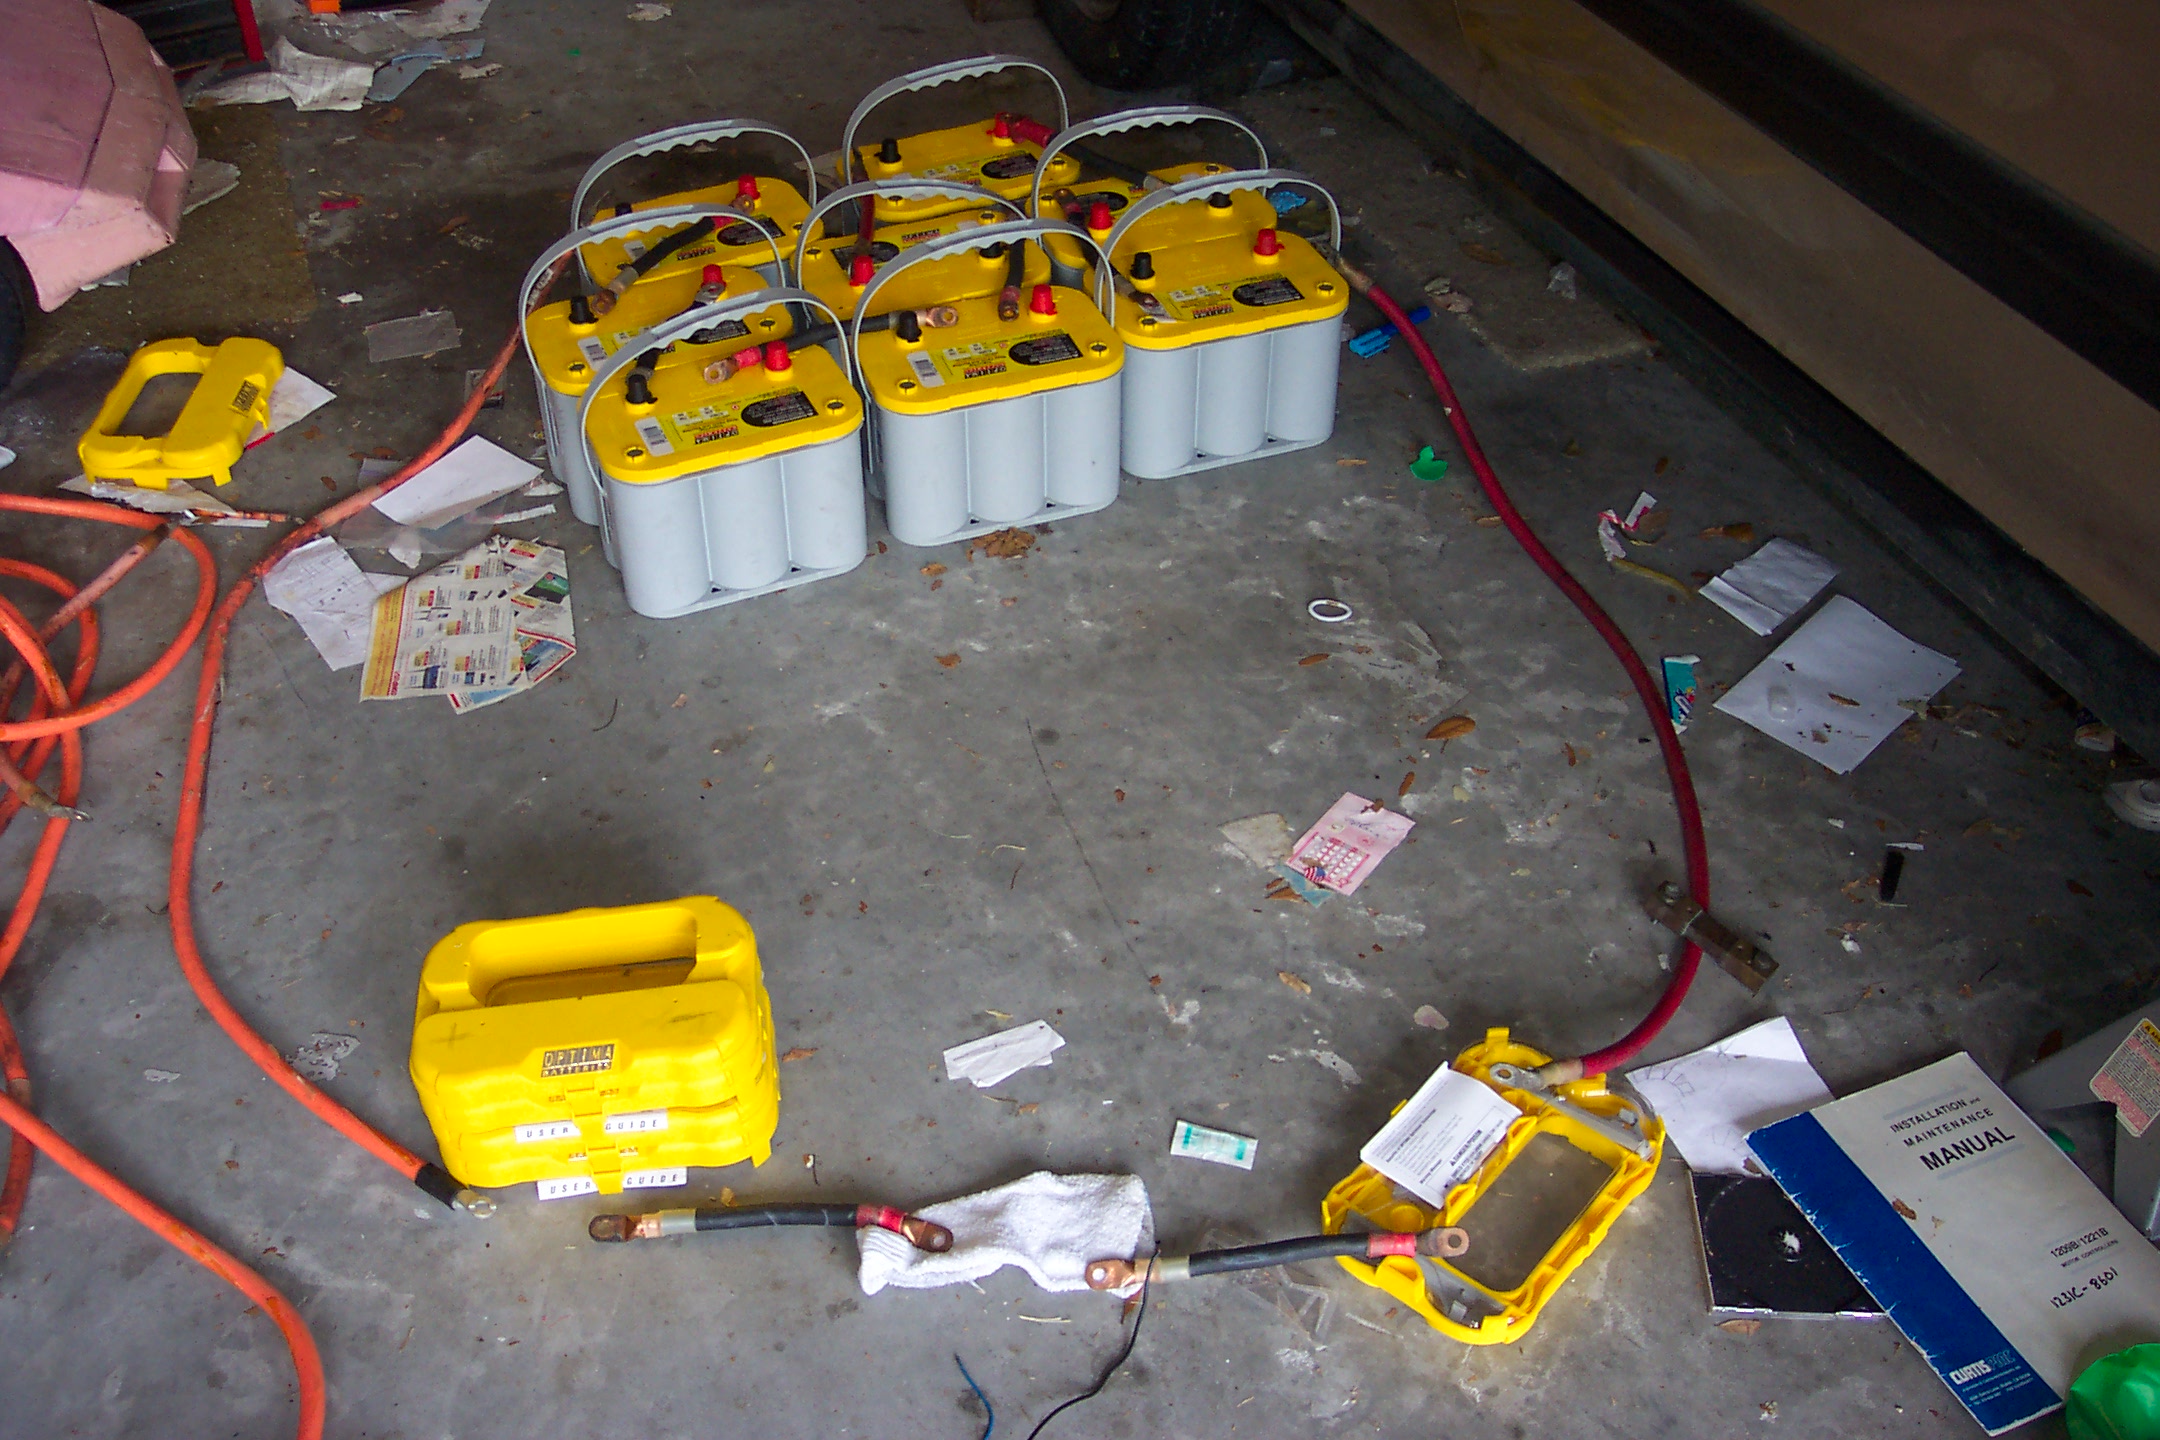
However, the big problem was understanding the pack wiring. I used this "block diagram" to solidify things for myself and eventually to communicate with Nathan. We had some trouble asserting that we couldn't just wire all twelve batteries together. Eventually we got that one sorted it, with copious use of the word "boom". Then we had to figure out where all the immediately important pieces went, and where the charger was going to go. In this diagram, the four stacked Optima YellowTop tops are the front battery pack; the 8 YellowTops are the rear battery pack, with tentative wiring, the upside-down top is the controller, and the sock is our high-amperage shunt. Yes, my garage is dirty. Deal with it.
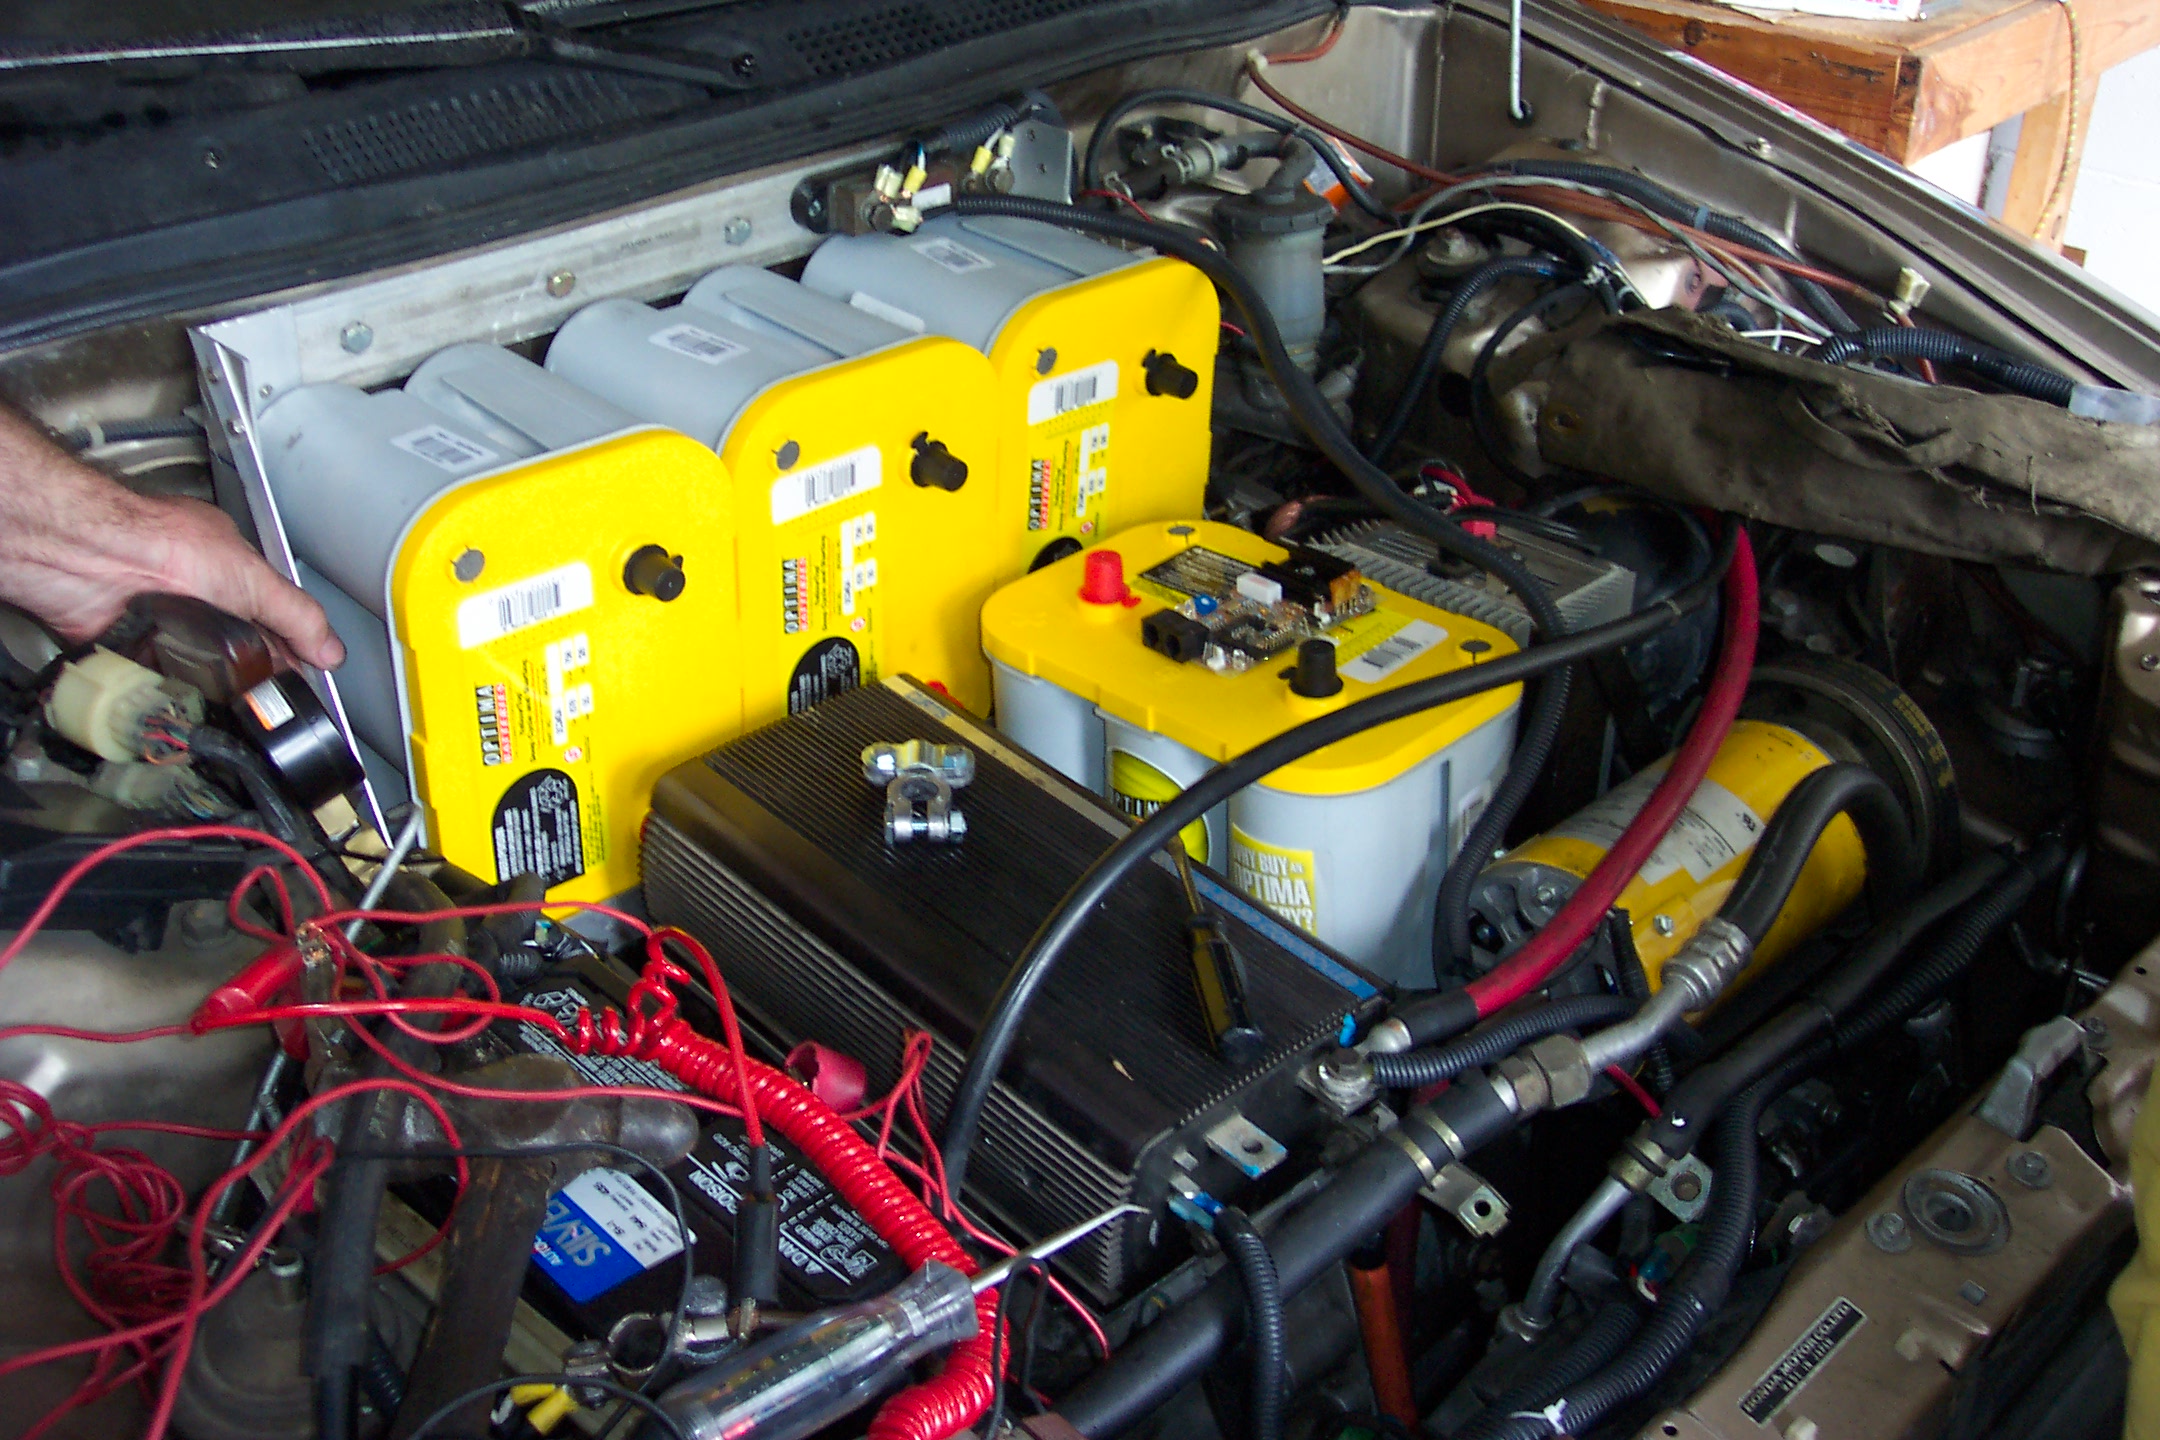
We put four batteries into the front rack for measuring purposes. Everything fit quite nicely, and the hood closes over those rear three and just touches the front edge. With these in place, we could measure the cable going from the rear pack to the front pack.
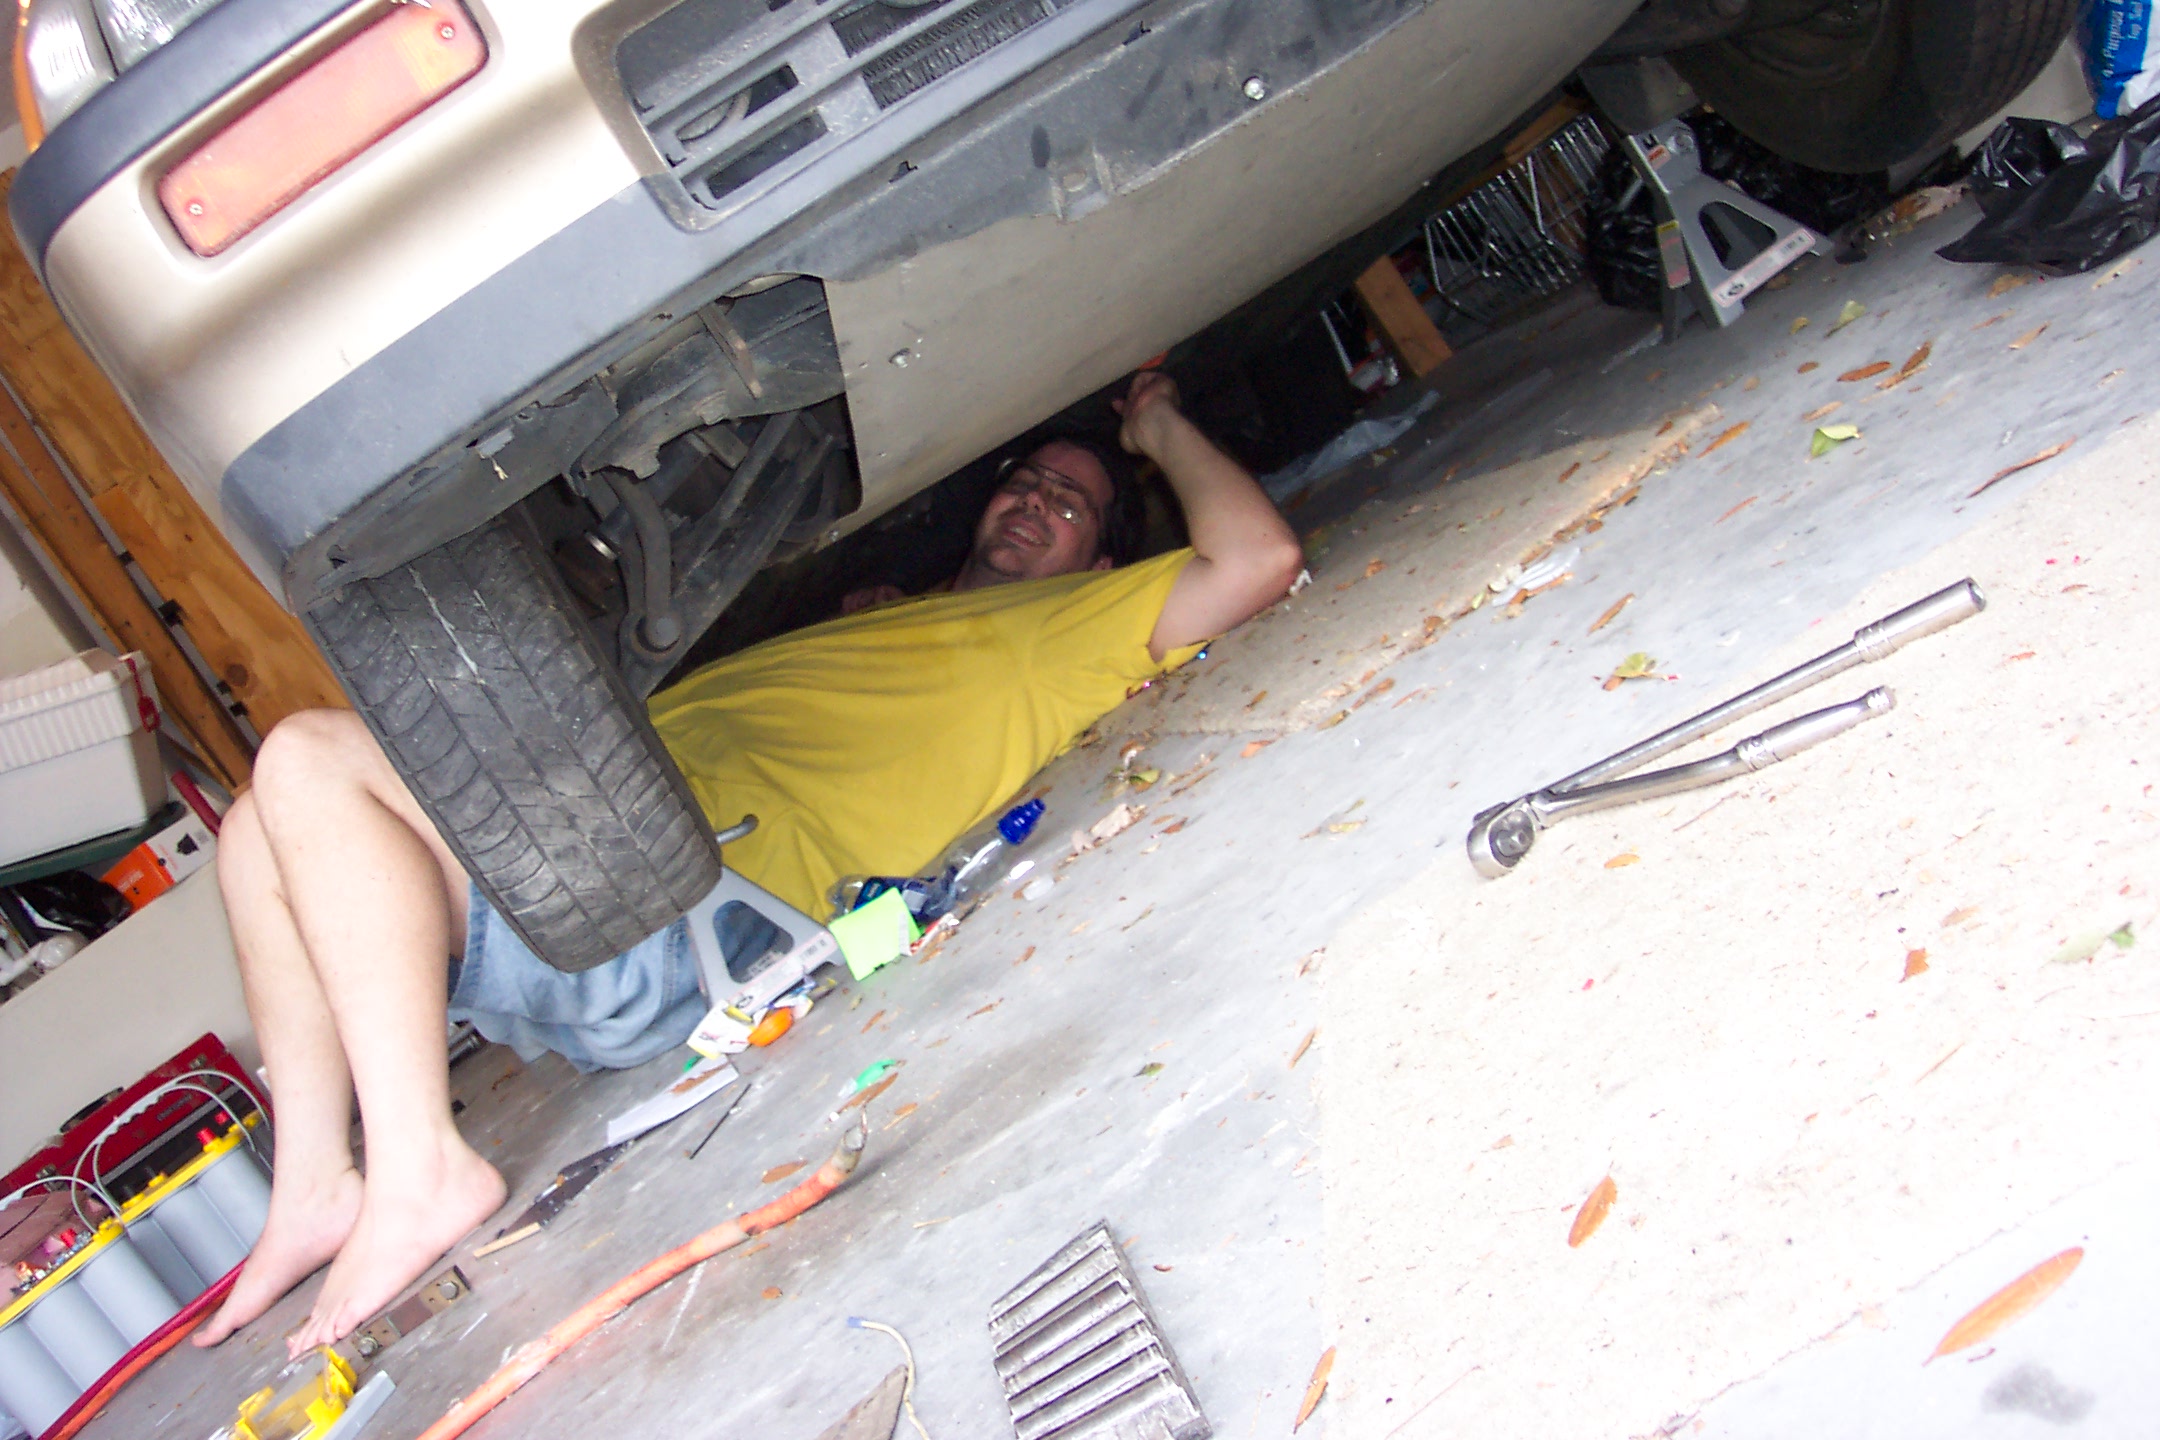
While Nathan rewired under the hood -- originally, we had wired the AC, DC-DC converter, and heater so they'd only be on when the "gas" pedal was pressed -- I slipped under the car and started running a length of cable from the battery to the emergency breaker. Yes, we had to jack it up higher to allow me to fit. I marked the length with a sharpie, then used that to find the closest piece of wire from the Ohmsmobile, our donor car. One fit exactly, but it had used marine-style terminals with lugs crimped onto the cables; that was fine for the breaker end, but the battery end needed a auto connector. I clipped it off and put a battery terminal on.
At which point, of course, I discovered my mistake. I was guilty of miswiring. The positive cable was supposed to come from the breaker to the main contactor. Which uses a crimped-on lug, not an auto connector. Measuring from there, the cable was about six inches too long. Not much of a consolation, since we could easily have eaten up that much slack. We cut it for the principle of the thing and crimped a new lug on with a hammer crimper. (I really can't afford the tool that makes the good crimps.)
Yes, we could've run the wire from its new location. We even diagrammed that on some paper. But it was ugly and complicated. Nathan used the word "Byzantine", which I wasn't aware applied to situations like this, but I like it. We went for the wasted cable and elegant, easily understandable solution.
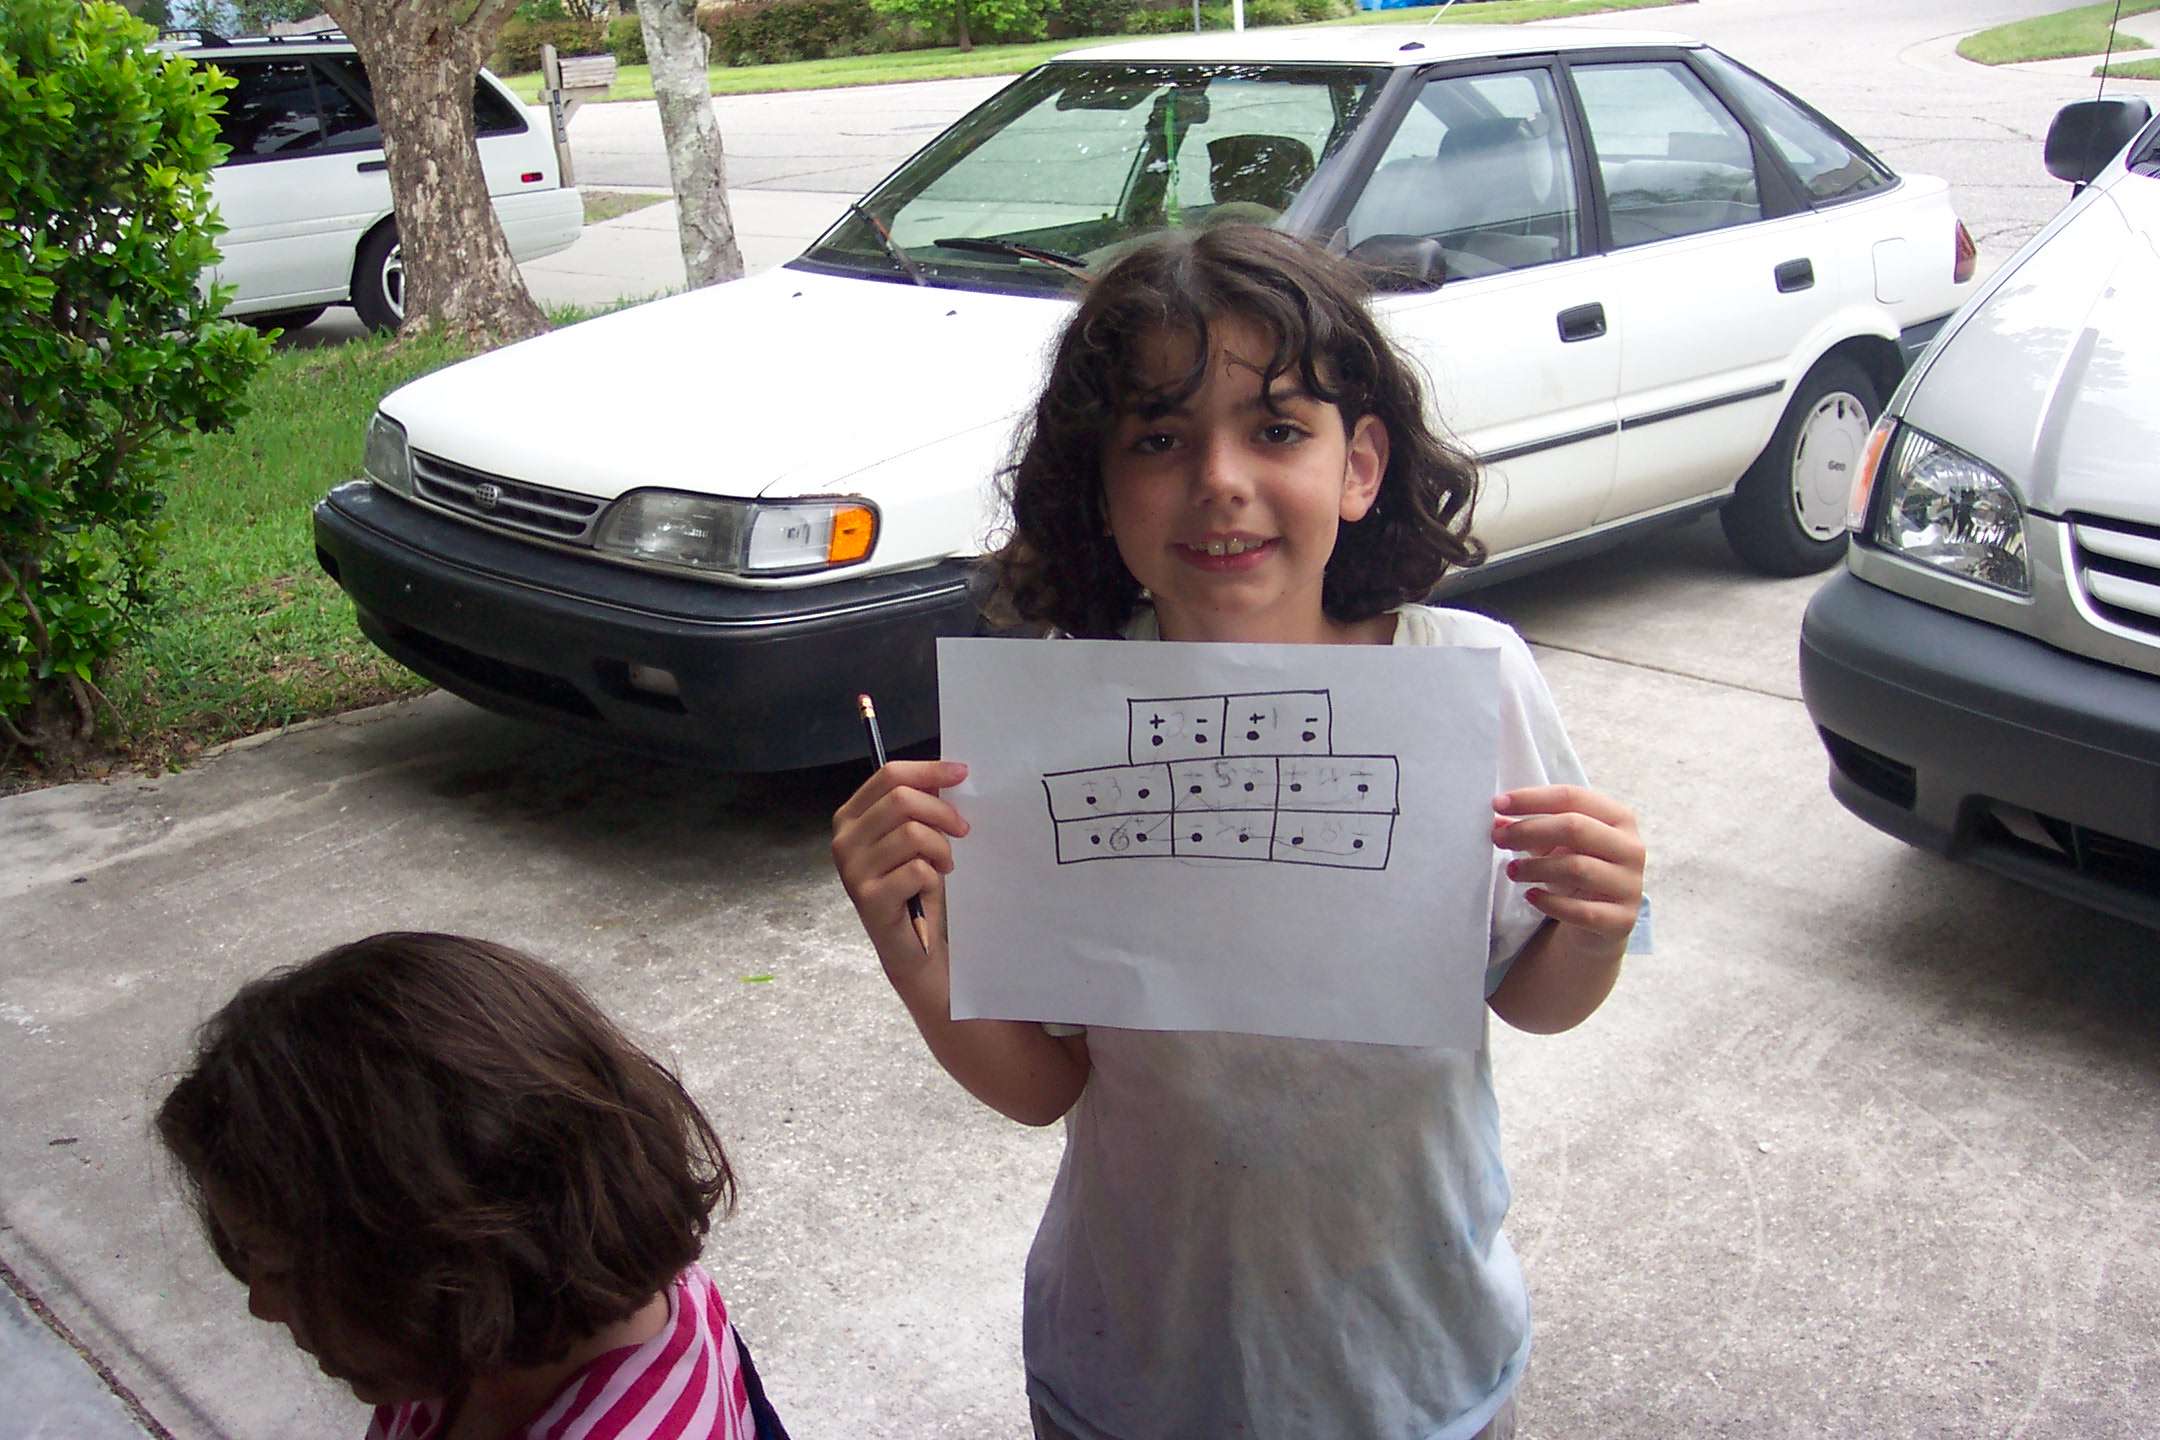
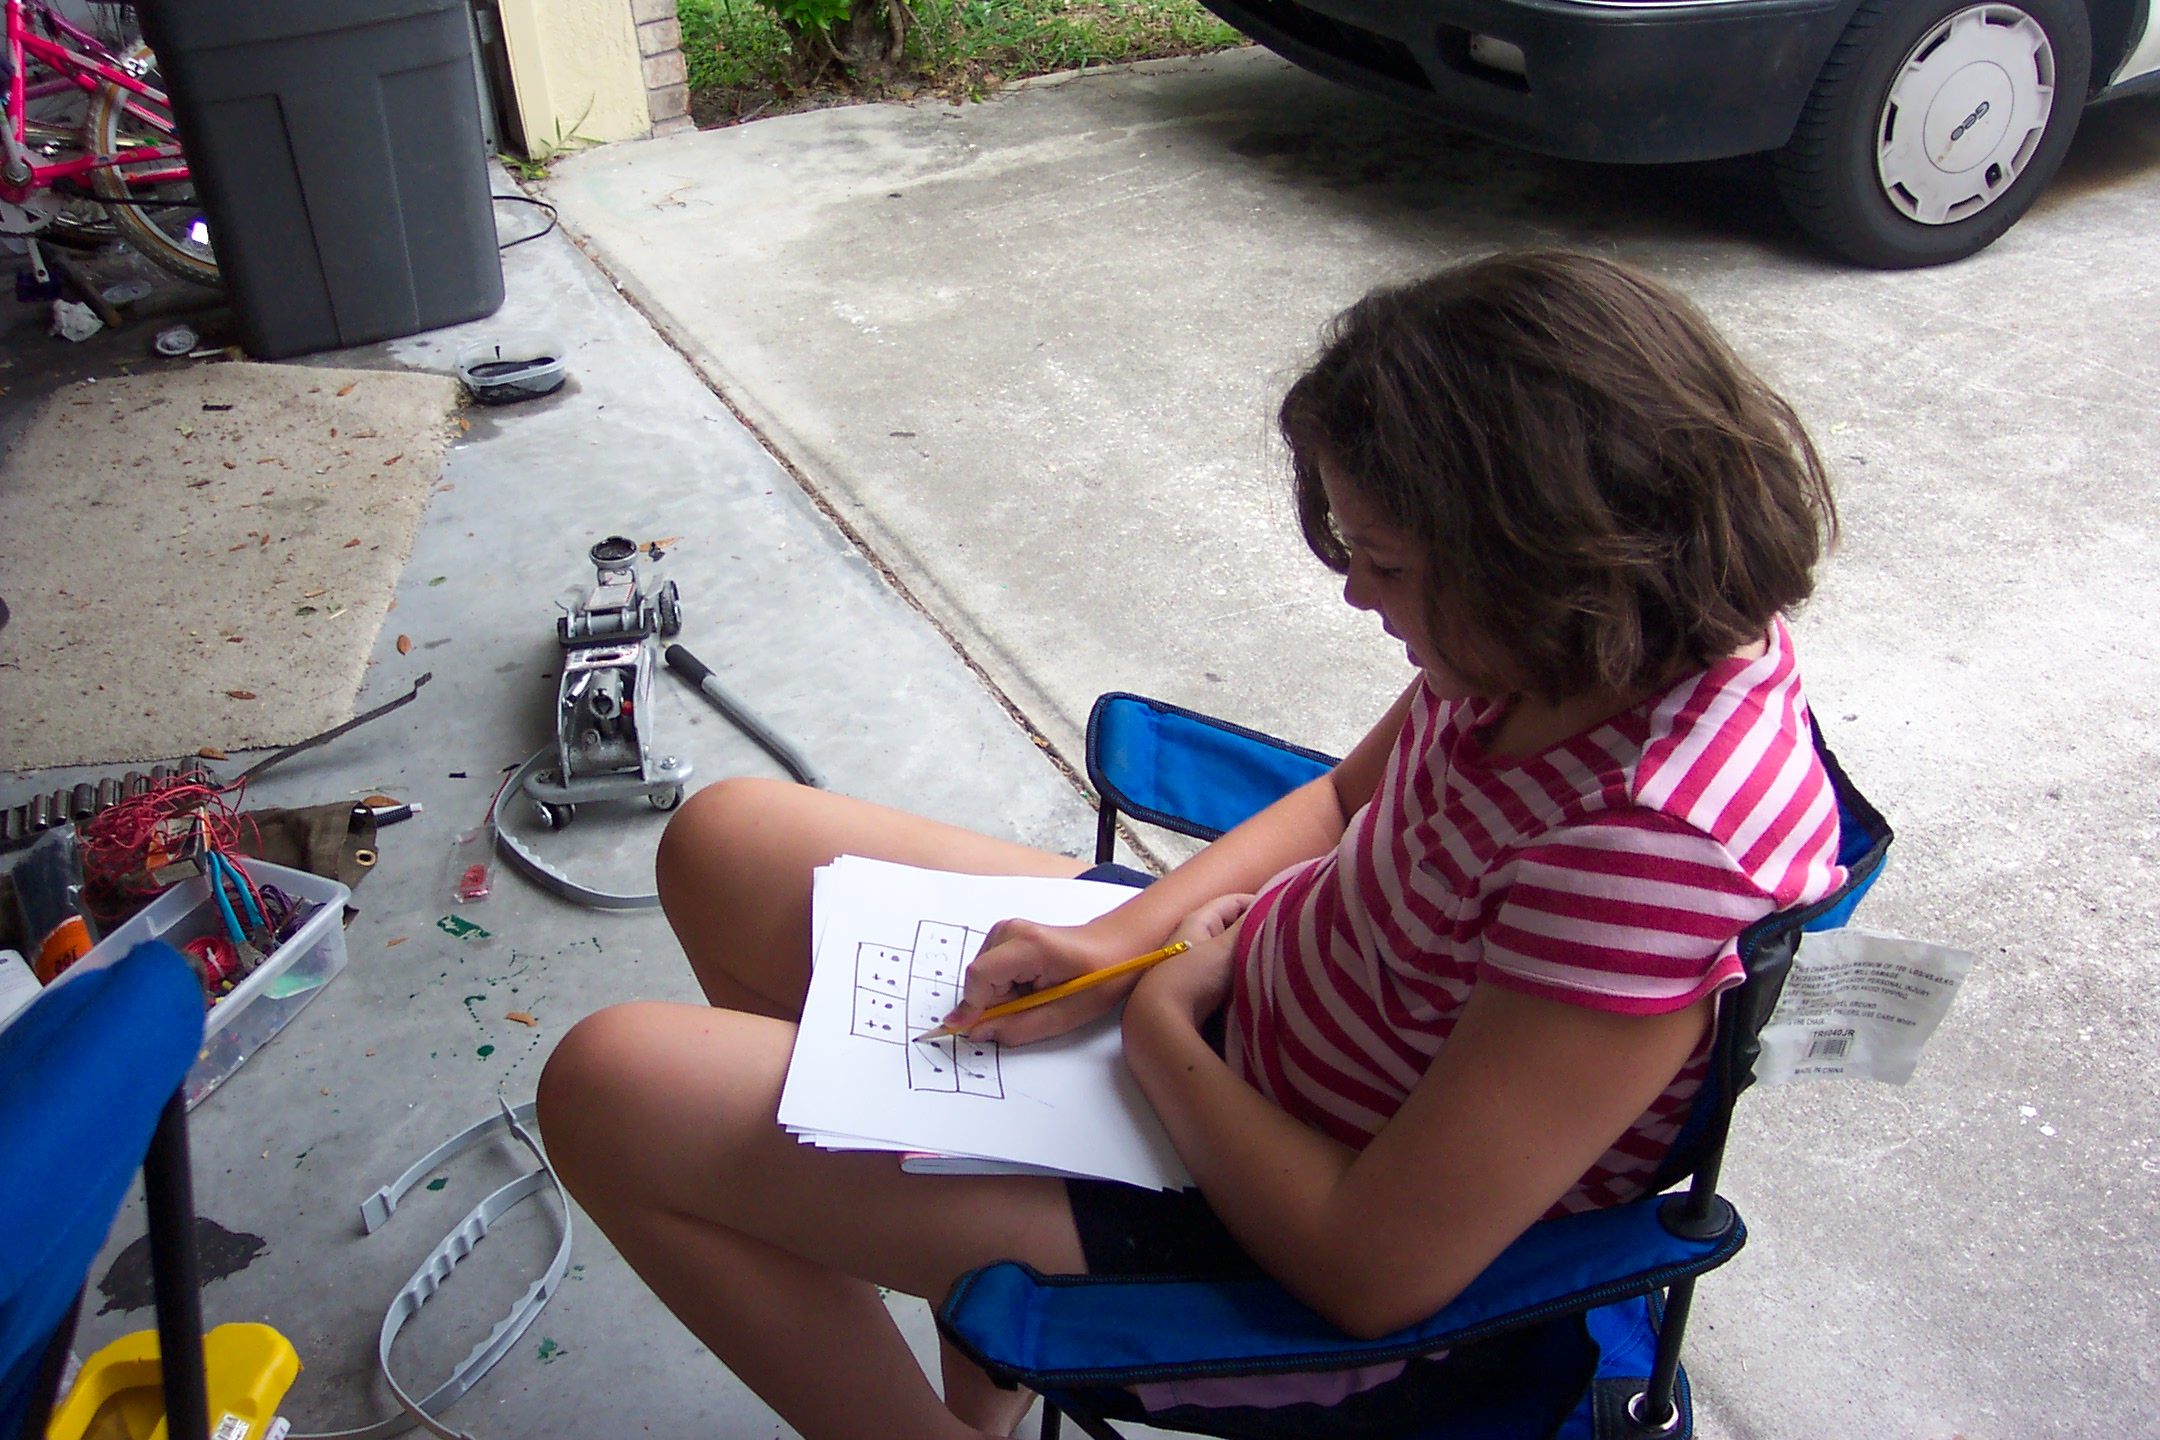

The issue of how to wire the rear pack was still unsolved, so we set the kids on it. Two of those batteries will be almost completely inaccessible. When I go to verify that their connections are still tight, I don't want to brush up against terminals and electrocute myself. They say that anything below 72 volts is "safe", but it's easy to wire up the batteries so that six of them are running through adjacent terminals. Eri started working on the problem, then made up little templates and handed them to the kids. You can see they worked pretty hard at it.
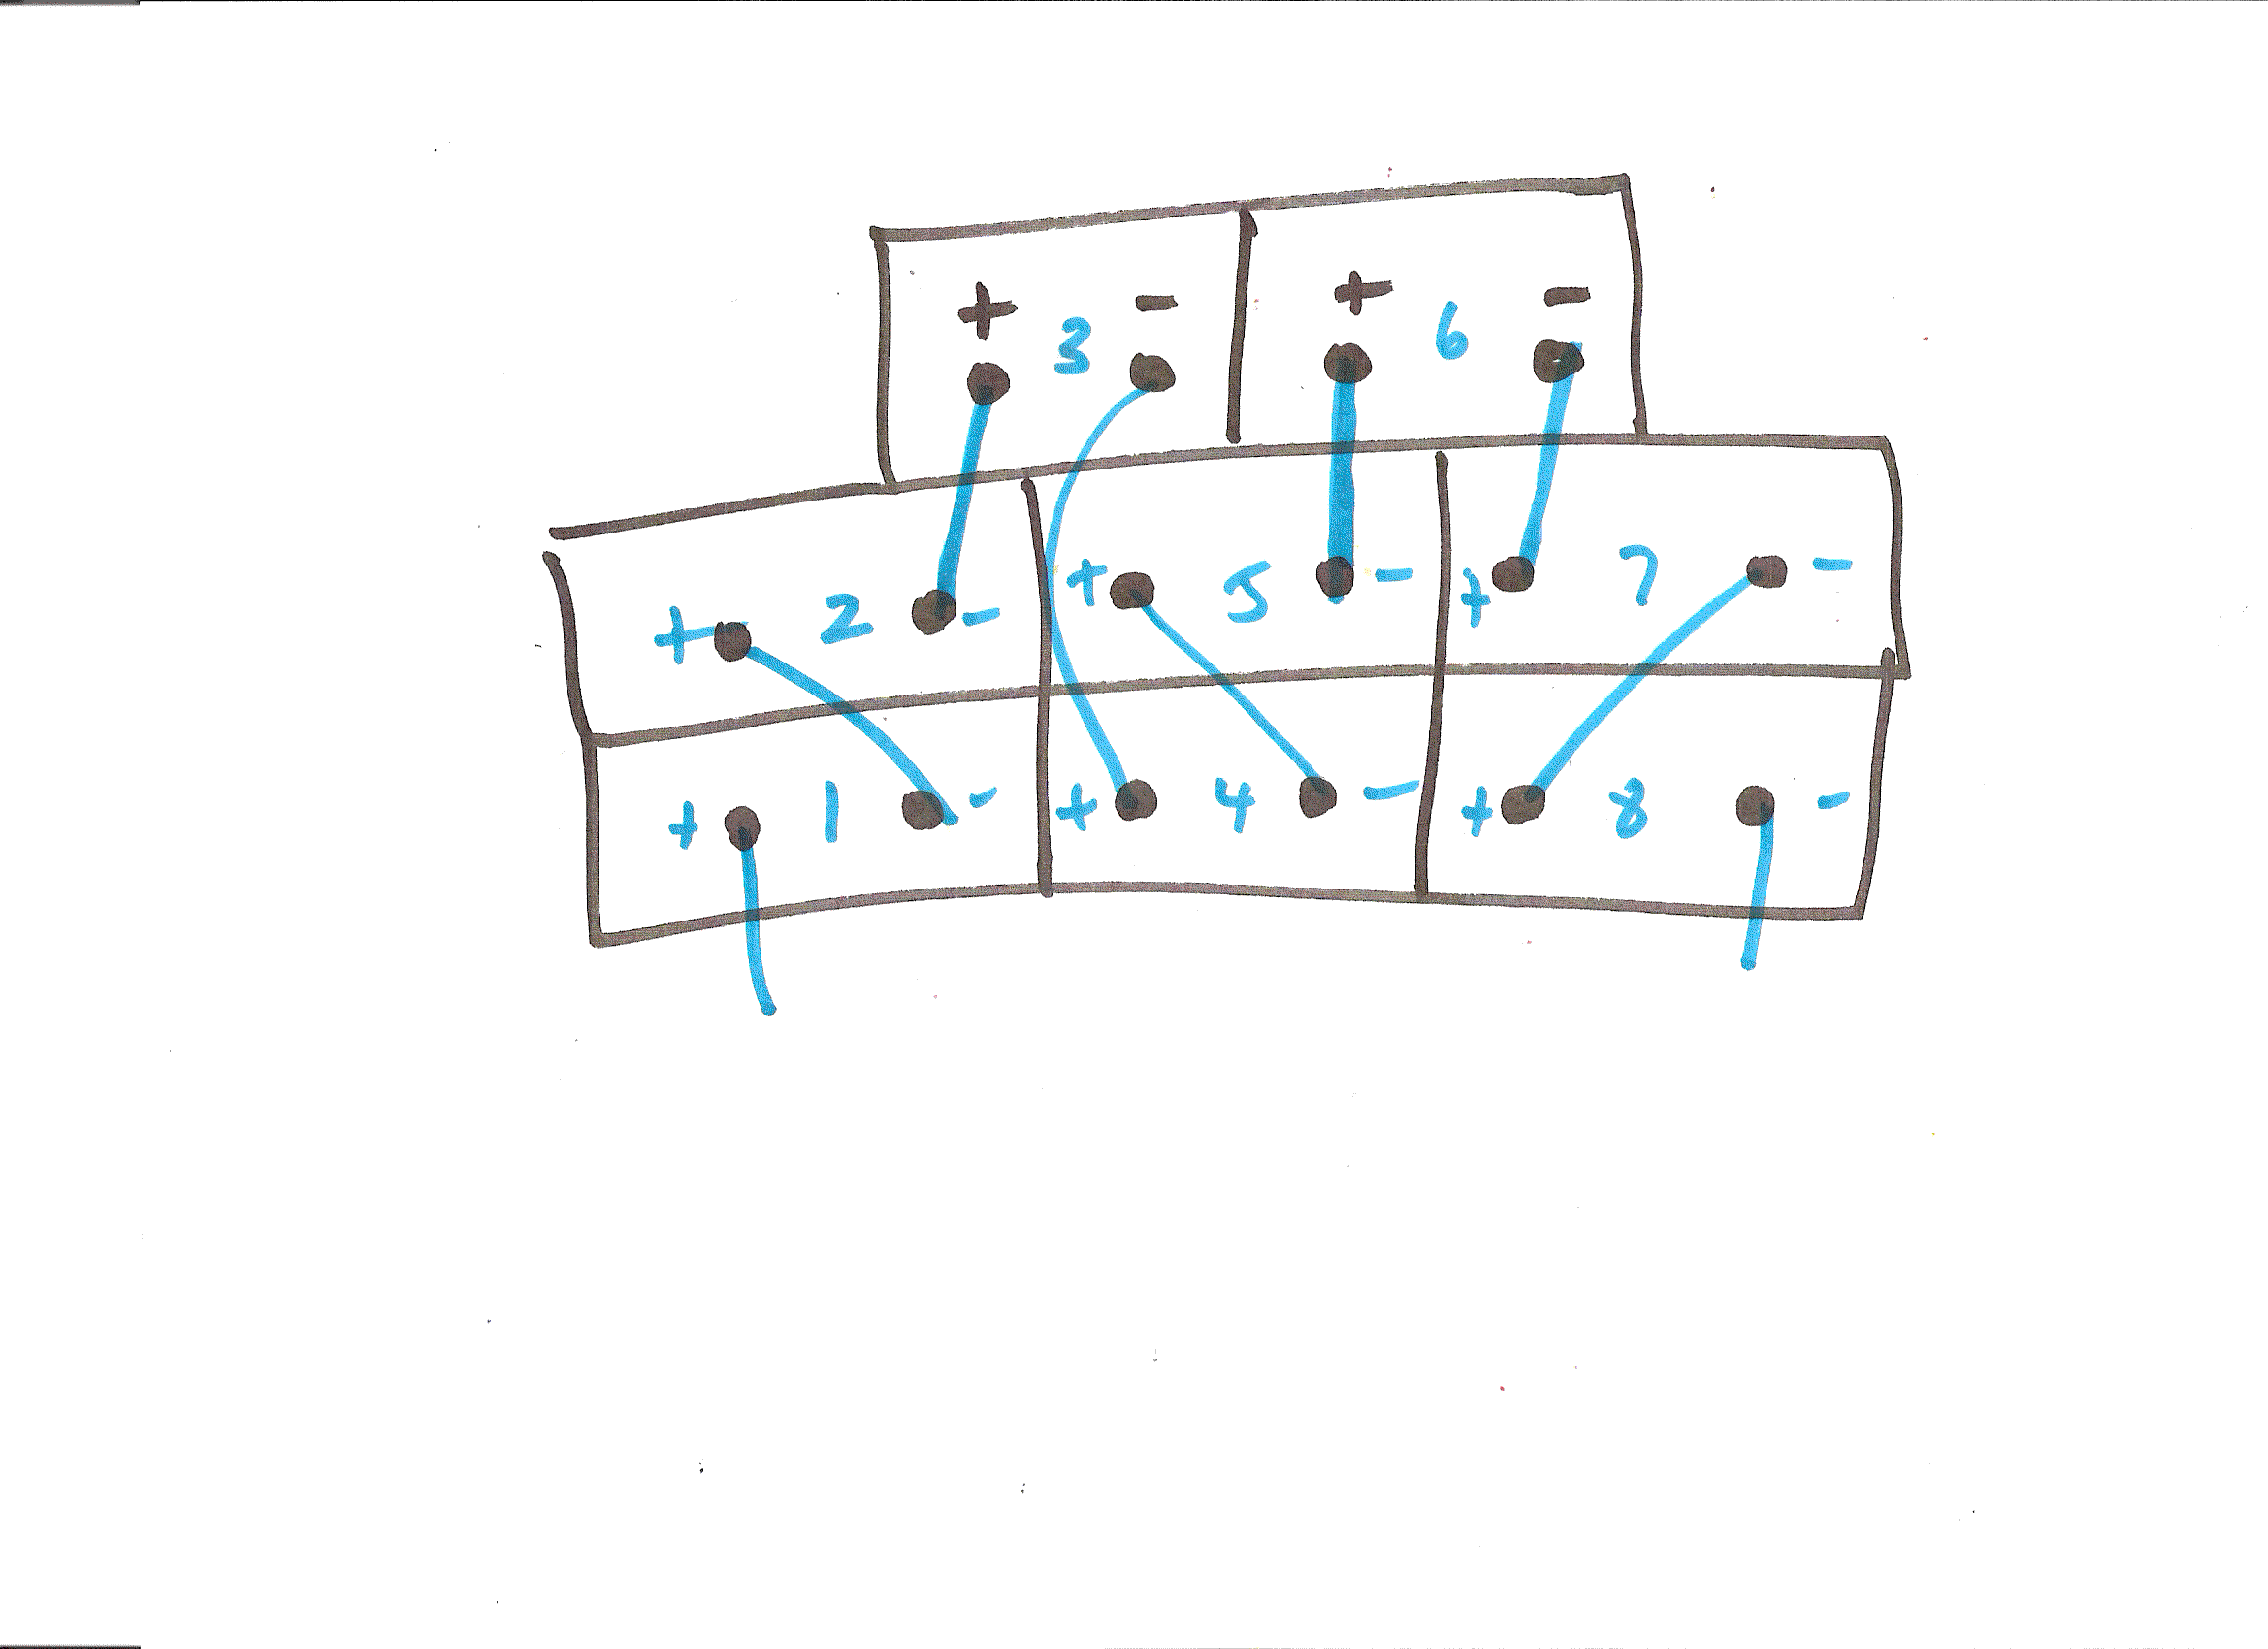
In fact, I'll be using one of Tatiana's designs for the rear pack. It's especially nice because it has no more than 4 batteries on adjacent terminals (that's only 48 volts), the wires come out near the center, and there's only 1 long wire in the whole pack. Brilliant work, especially from a 11-year-old. If you're interested, you can click to see Eri's detailed anaysis of the rear pack design. It'll open in a new window.
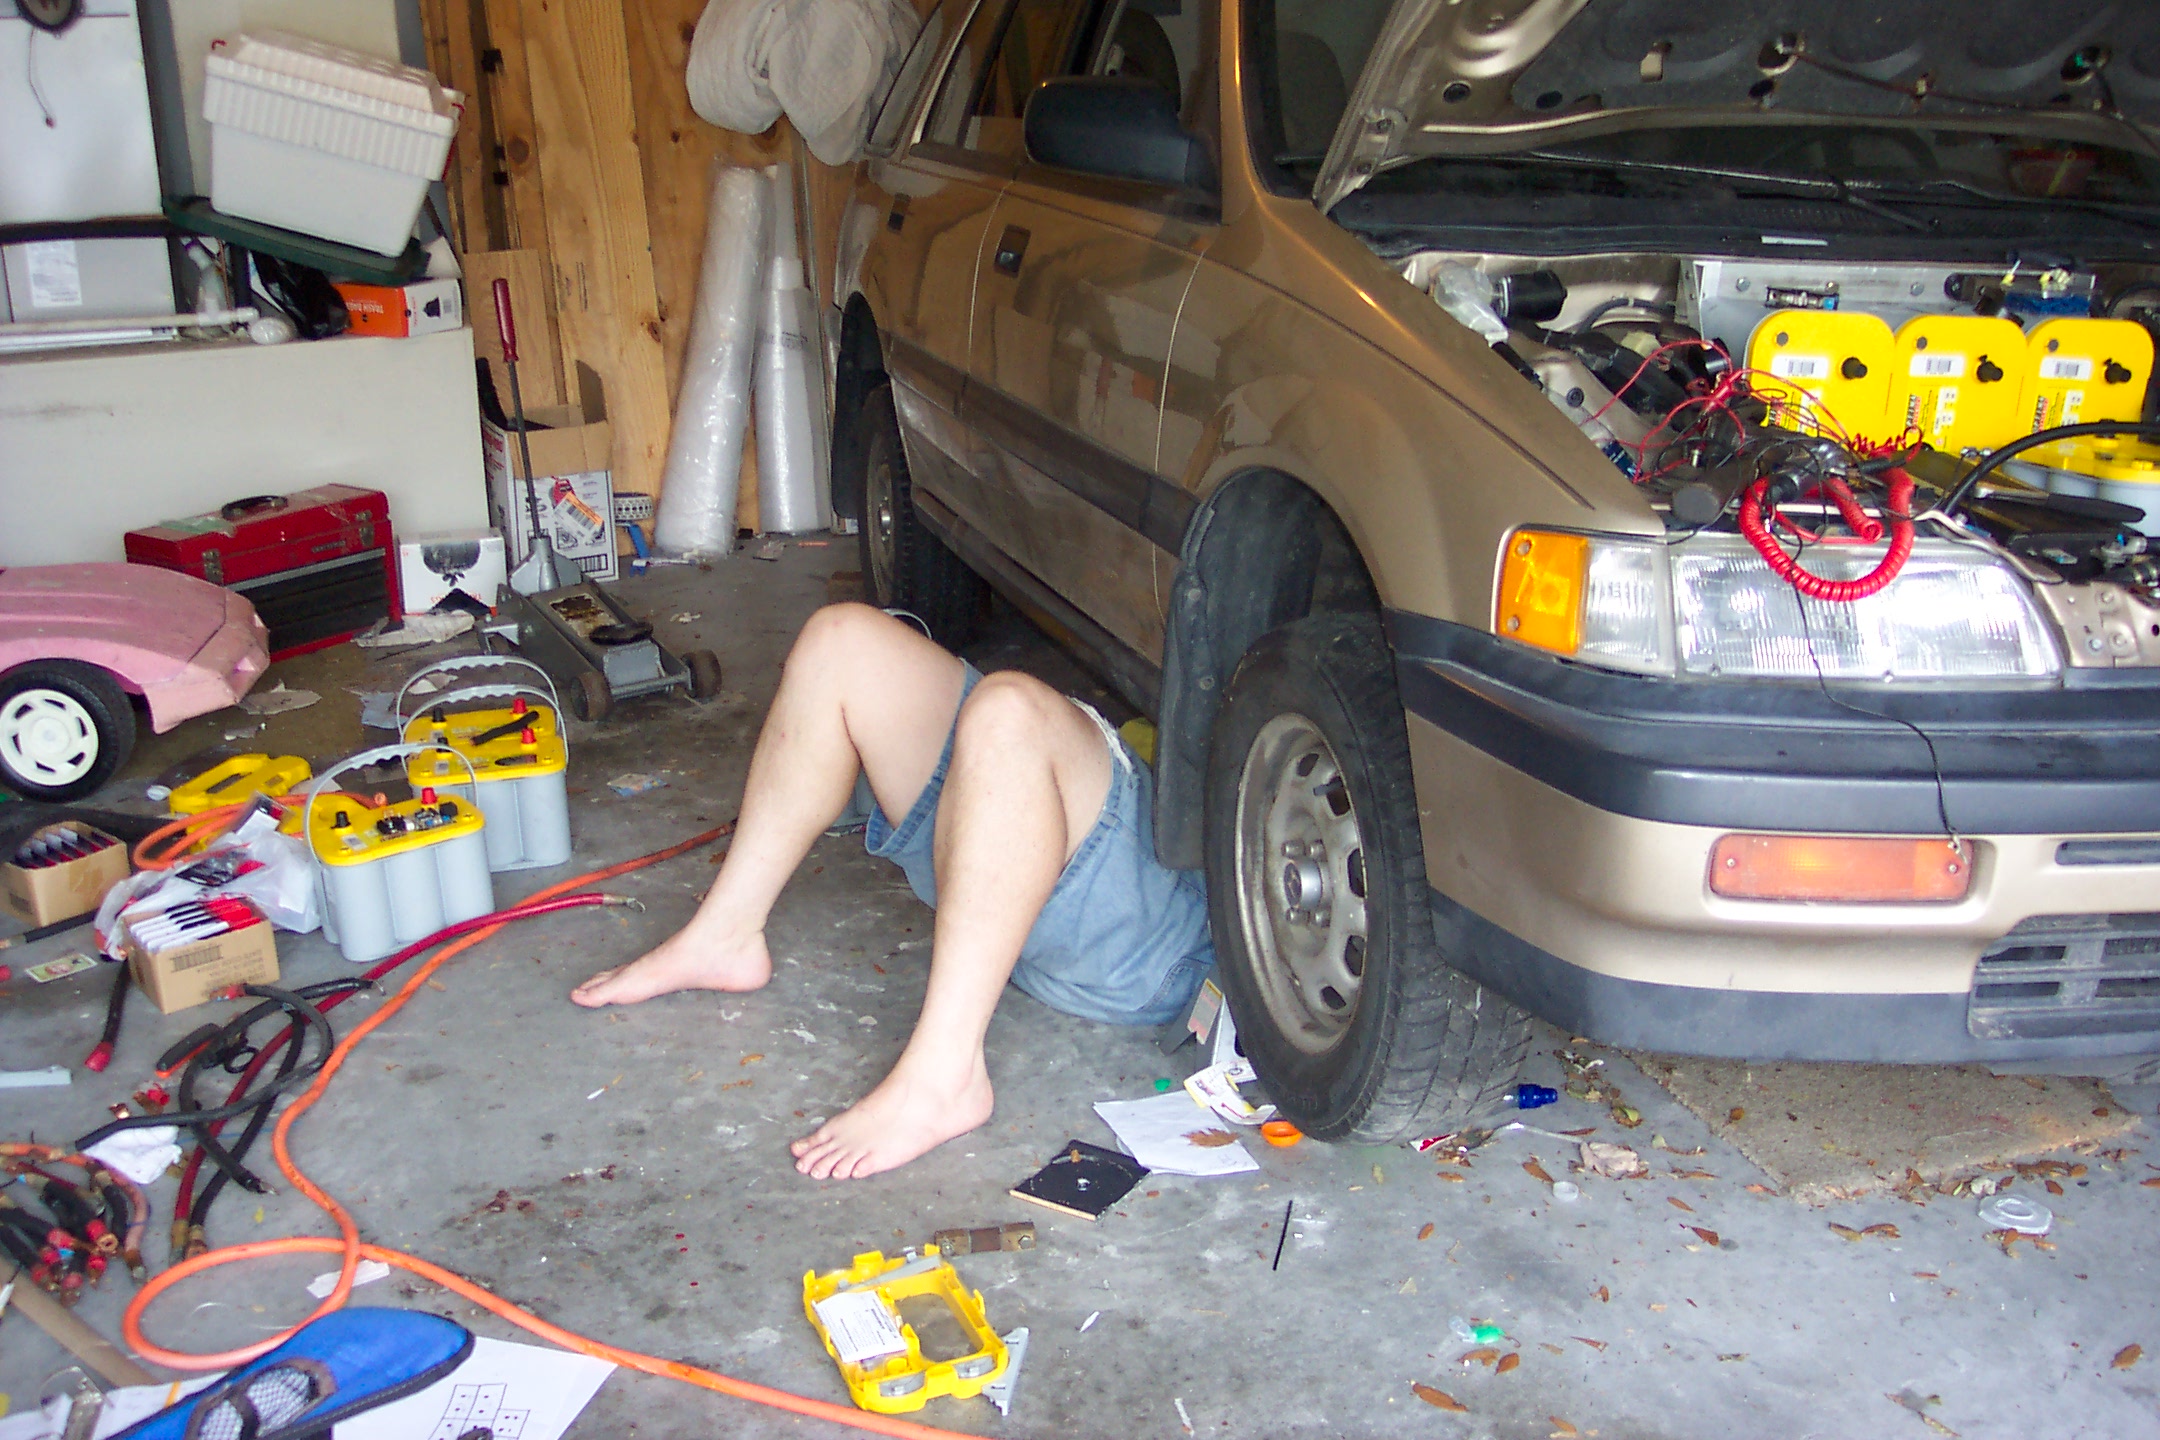
The terminal covers we had obtained didn't fit over our lugs, so we couldn't wire up the pack quite yet. And Nathan's girlfriend came over to watch "Treasure Hunters", so we decided to call it a day. Not much to show for six hours of work.
At this point, Nathan introduced us to his philosophy of work. He said that the reason he actually gets stuff accomplished is because, before he quits, he does "one more thing". We figured we could verify that our plan for the regulators would work.

Here we see a single Optima YellowTop with a regulator on top. I've gone to considerable expense for these batteries, as mentioned earlier, and I intend to baby them. That's the biggest problem for newbie EV owners: they tend to kill their first battery pack rather quickly. If I do that, my wife is likely to kill me.
Two easy ways to kill a battery are overcharging and overusing. But since all batteries aren't the same, some of them have more charge than others. Then a single battery gets used more, and the other batteries don't get charged as much. The regulators help take care of this problem by making sure all the batteries get the same charge. When one of them get "full", it shunts the charge off the battery, making heat instead. I even went the extra mile and bought a charger that can talk to the regulators and turn down the juice when stuff gets too hot.
The only problem is that the regulators get hot, too. You don't want to place them directly on top of the battery, since they could start melting through. We got a rubber floormat at the junkyard for $3.00, cut it into appropriately-sized chunks, and used double-sided tape to stick everything together. The floormat has ridges, which will allow a little bit of ventilation, and the tape is the same stuff you use to put numbers on your house. It was probably strong enough to lift the whole battery; we stopped trying because those regulators are just too valuable to me.


The only problem with "do one more thing" is that you don't know when to stop. When we verified that one regulator would work, we continued by cutting the rest of the chunks out of the floormat and attaching tape to them, but not exposing the second side. Then we worked on the rear pack design some more. Then we decided to strip the rest of the battery connector cables so they'd be ready to accept the terminal lugs.
I can't even remember what made us decide to stop.
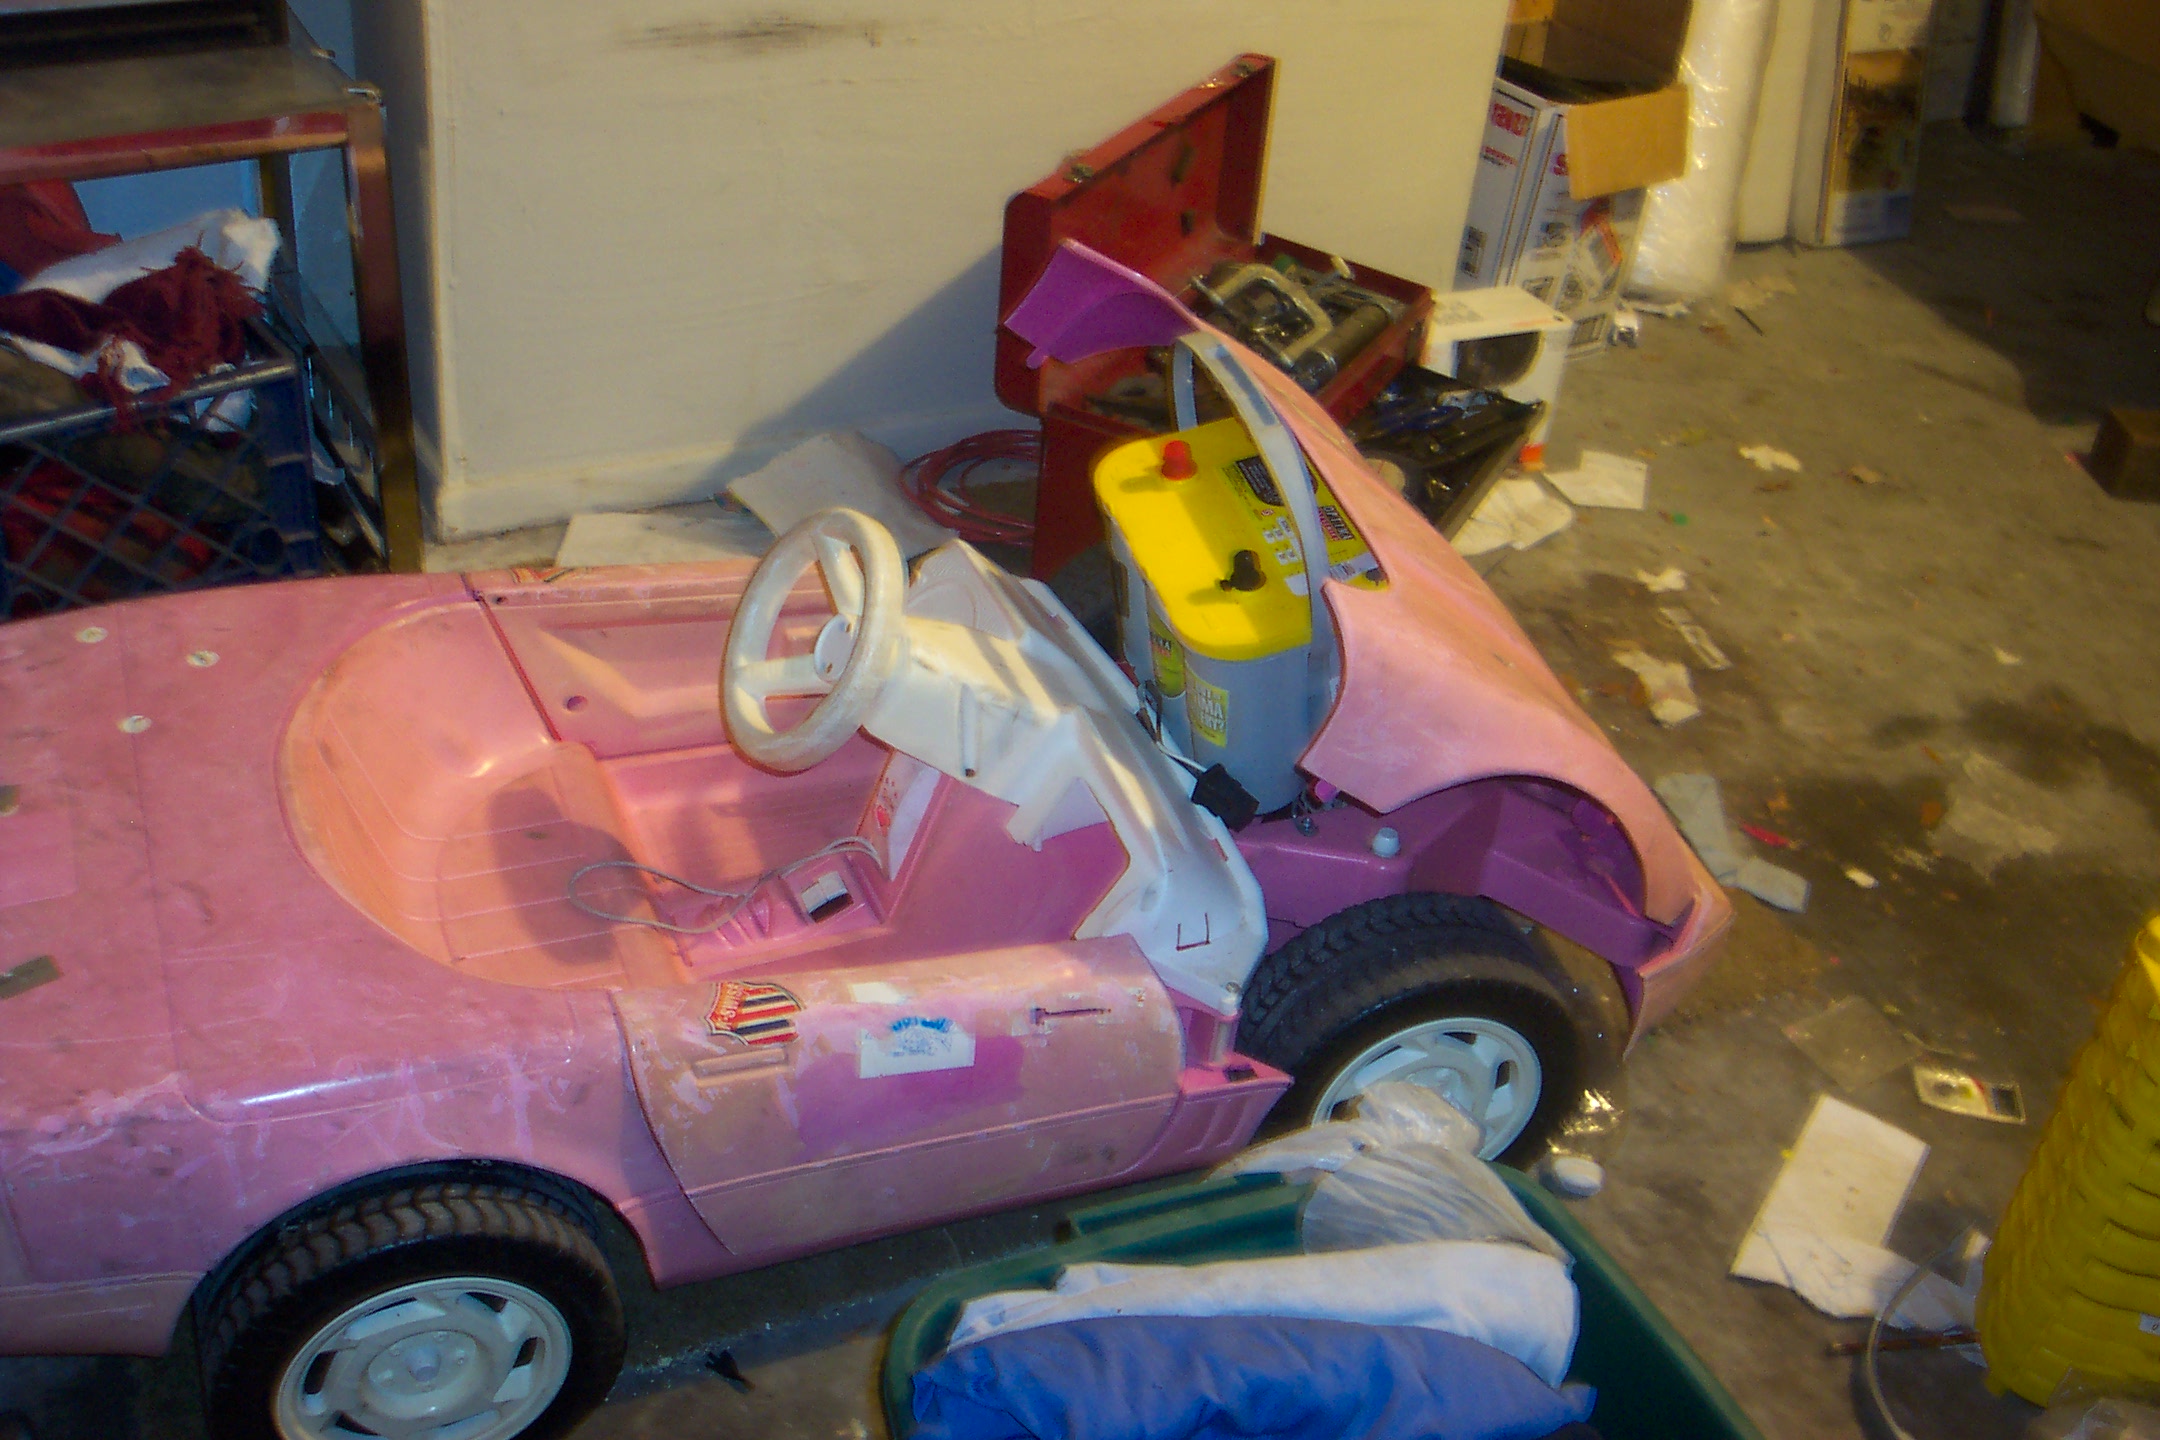
Looks like Pinky wants to be a big EV. Hmmm... I wonder what would happen if I actually wired that up?